The Ultimate Healthy Indulgence Homemade Chocolate Coated Nut and Fruit Bars
In the world of snacking, we often feel forced to choose between something that tastes indulgent and something that actually nourishes our bodies. We reach for a chocolate bar when we need a pick-me-up, only to face a sugar crash an hour later, or we settle for a bland “health bar” that leaves us unsatisfied. However, there is a middle ground where decadent dark chocolate meets the high-fiber, protein-packed power of nuts and dried fruits. These homemade chocolate-coated nut and fruit bars are the definitive answer to the mid-afternoon slump. By crafting these in your own kitchen, you take full control over the quality of the ingredients—eliminating the high-fructose corn syrup, artificial preservatives, and waxy fillers found in commercial candy. This guide will walk you through the nutritional science of this perfect snack, provide a foolproof master recipe, and show you how to customize these bars for maximum energy and flavor.
The Synergy of Flavor and Function
The secret to a truly satisfying snack lies in the balance of macronutrients. These bars are designed to provide a steady release of energy rather than a quick spike. The healthy fats and plant-based proteins found in the nuts slow down the absorption of the natural sugars from the dried fruits. Meanwhile, dark chocolate provides a rich source of flavonoids and a gentle cognitive boost. This combination creates a “functional dessert” that satisfies your sweet tooth while supporting your brain and body. Whether you are packing them for a long hike, a busy workday, or a healthy treat for the kids, these bars offer a superior alternative to anything you can find on a grocery store shelf.
Breaking Down the Nutritional Powerhouse
To understand why these bars are so effective, let’s look at the key components that make up their layers.
Nuts: The Heart-Healthy Foundation
The base of these bars is a dense mixture of almonds and peanuts (or your preferred nut blend). Almonds are particularly prized for their high Vitamin E content and monounsaturated fats, which support skin health and heart function. Peanuts add a satisfying “crunch” and a significant amount of protein to help with muscle recovery. By lightly toasting the nuts before assembly, you not only enhance their flavor but also make their nutrients more bioavailable.
Dried Fruits: Nature’s Candy
Instead of refined sugar, these bars rely on raisins and dried cranberries for sweetness. These fruits are concentrated sources of fiber and antioxidants. Raisins provide a quick source of energy and iron, while dried cranberries add a pleasant tartness and are well-known for supporting urinary tract health. Because these fruits are naturally sticky, they act as a “glue” that helps hold the bar together without the need for excessive syrups.
Oats: The Sustained Energy Source
Rolled oats provide the structural integrity of the bar. As a complex carbohydrate, oats are rich in beta-glucan, a type of soluble fiber that has been shown to lower cholesterol and keep you feeling full for longer. They add a chewy, satisfying texture that balances the crispness of the nuts.
Dark Chocolate: The Antioxidant Top-Off
The crowning glory of these bars is the thick layer of dark chocolate. Choosing a chocolate with at least 70% cocoa solids ensures you are getting a significant dose of magnesium and antioxidants. Dark chocolate is a “mood food” that stimulates the production of endorphins, making these bars as good for your mental health as they are for your physical well-being.
Master Recipe: Chocolate-Coated Nut and Fruit Bars
This recipe requires no actual baking, making it a quick and accessible project for any home cook.
Ingredients
- 1 1/2 Cups Rolled Oats: Use old-fashioned oats for the best texture.
- 1 Cup Mixed Nuts: A blend of whole almonds and halved peanuts works best.
- 1/2 Cup Dried Fruit: A mix of raisins and dried cranberries for a balance of sweet and tart.
- 1/2 Cup Natural Nut Butter: Peanut or almond butter acts as a binder.
- 1/4 Cup Raw Honey or Maple Syrup: To provide a touch of extra sweetness and stickiness.
- 1 1/2 Cups Dark Chocolate Chips: For the decadent coating.
- 1 Tablespoon Coconut Oil: To help the chocolate melt smoothly and set firmly.
- A Pinch of Sea Salt: To enhance the chocolate and nut flavors.
Step-By-Step Preparation
- Toast the Base: In a dry skillet over medium heat, lightly toast the oats and nuts for 3-5 minutes until they become fragrant. This step is optional but highly recommended for a professional-grade flavor.
- Mix the “Glue”: In a small microwave-safe bowl, combine the nut butter and honey. Heat for 30 seconds and stir until smooth.
- Combine the Dry and Wet: In a large mixing bowl, toss the toasted oats, nuts, raisins, and cranberries together. Pour the warm nut butter mixture over the top and stir until everything is evenly coated.
- Press into the Pan: Line an 8×8 inch square baking pan with parchment paper. Transfer the mixture to the pan and press down very firmly with the back of a spoon or a flat measuring cup. The more you compress the mixture, the better the bars will hold their shape.
- Melt the Chocolate: Using a double boiler or a microwave in 30-second intervals, melt the dark chocolate chips with the coconut oil and a pinch of sea salt until silky smooth.
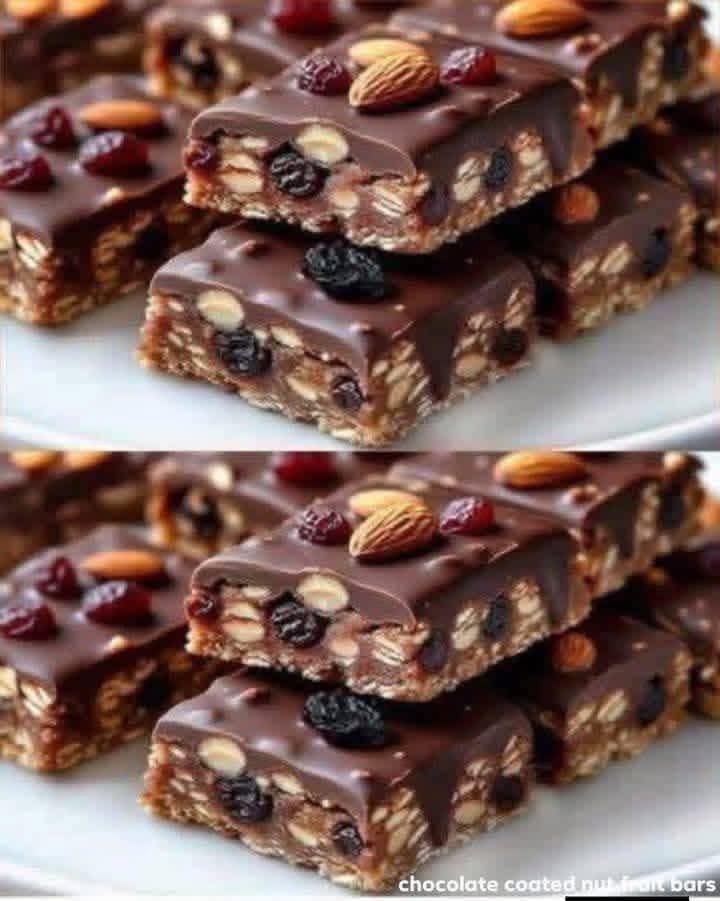
- The Final Layer: Pour the melted chocolate over the nut and fruit base, spreading it to the edges with a spatula. You can garnish the top with a few extra almonds and raisins for the aesthetic shown in the image.
- Set and Slice: Place the pan in the refrigerator for at least 2 hours (or the freezer for 45 minutes) until the chocolate is completely set. Lift the parchment paper out of the pan and use a sharp knife to slice into rectangular bars.
Pro-Tips for Perfect Bars
- The “Clean Cut”: To get the perfectly straight edges seen in the photos, run your knife under hot water and wipe it dry between each cut. The heat will slice through the chocolate layer without cracking it.
- Storage Matters: Because these bars use natural ingredients and no stabilizers, they are best kept in an airtight container in the refrigerator. They will stay fresh and crunchy for up to two weeks (though they rarely last that long!).
- Firmness Hack: If your bars feel a bit crumbly, it usually means they weren’t pressed hard enough into the pan. Don’t be afraid to use some muscle to pack the mixture down before adding the chocolate.
Creative Variations to Explore
Once you master the basic recipe, you can experiment with different “profiles” to keep your snack game interesting.
- The Tropical Bar: Swap the raisins for dried mango and coconut flakes. Use white chocolate for a creamy, tropical twist.
- The “Omega-3” Special: Use walnuts and chia seeds as your nut/seed base for a massive boost of healthy fats.
- The Espresso Bar: Stir a teaspoon of finely ground coffee into the melted chocolate for a caffeinated kick.
Frequently Asked Questions
Can I make these nut-free?
Yes! You can substitute the nuts with a mix of sunflower seeds and pumpkin seeds (pepitas), and use sunflower seed butter as the binder. The texture remains similar and just as delicious.
Are these bars gluten-free?
As long as you ensure your oats are certified gluten-free, the rest of the ingredients are naturally gluten-free.
Can I use milk chocolate instead?
You can, but the bars will be much sweeter and will lack the high antioxidant content of dark chocolate. Milk chocolate also has a lower melting point, so the bars might get a bit messy if left out of the fridge.
Conclusion: The Power of Homemade Nutrition
Taking control of your snacks is one of the easiest ways to improve your daily energy levels and overall health. These chocolate-coated nut and fruit bars prove that you don’t have to sacrifice flavor to eat well. By combining the fiber of oats, the protein of nuts, and the antioxidant power of dark chocolate, you are creating a snack that supports your body’s needs while satisfying your cravings. The next time you feel that afternoon energy dip, skip the vending machine and reach for one of these homemade masterpieces. They are a celebration of real food, simple preparation, and the idea that the best treats are the ones we make ourselves. Happy snacking!