Homemade Old Fashioned Orange Jelly Candy The Ultimate Recipe
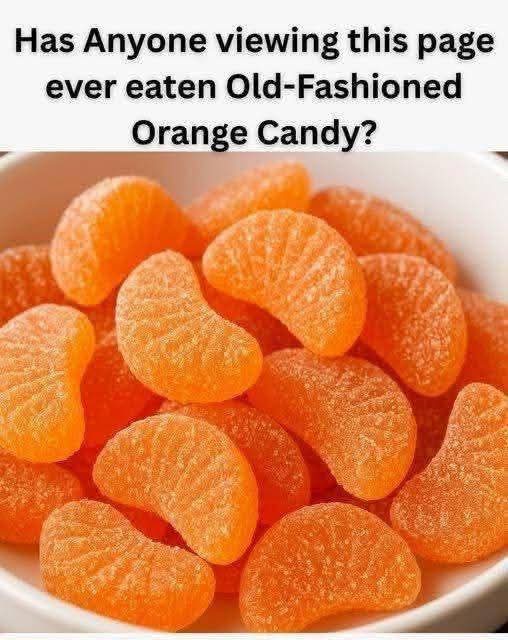
There is a distinct, bittersweet magic hidden within the crinkly cellophane wrappers of vintage confectionery. For many of us, catching a glimpse of a vibrant bowl of sugar-dusted, crescent-shaped treats instantly triggers a wave of pure nostalgia. The image in 1000005441.jpg poses a simple question that resonates deeply with generations of sweet lovers: “Has Anyone viewing this page ever eaten Old-Fashioned Orange Candy?” If your answer is a resounding yes, you likely remember the exact tactile sensation of picking one up—the light dusting of sugar crystals sticking to your fingertips, the soft yet substantial resistance as you bite into the center, and that explosive, bright burst of citrus flavor that feels both comforting and timeless.
Unfortunately, many modern store-bought variations of these classic orange slices have traded authentic flavor for artificial syrups, high-fructose additives, and synthetic dyes. They often leave behind a plastic-like chew and a medicine-like aftertaste rather than the clean, sunny essence of real citrus. The good news is that recreating this nostalgic masterpiece at home is remarkably simple, deeply satisfying, and allows you to use real fruit juices and natural ingredients. In this comprehensive guide, we will dive into the fascinating history of jelly candies, explore the culinary science behind achieving the perfect soft-chew texture, and provide an foolproof, step-by-step recipe to bring the timeless magic of old-fashioned orange slices straight to your modern kitchen.
The Nostalgic Legacy of the Citrus Slice
To understand why old-fashioned orange candy holds such a special place in culinary history, we have to look back to the late 19th and early 20th centuries. This was the golden age of American and European confectionery manufacturing, a time when candy makers began experimenting with natural gelling agents to create soft, fruit-flavored delicacies that could be easily preserved, transported, and sold in bustling corner sweet shops.
A Staple of the Vintage Candy Counter
Long before mass-produced chocolate bars dominated checkout lanes, confectionery was defined by variety, texture, and bright fruit profiles. Glass jars filled to the brim with sugar-coated jelly wedges were a staple of old-school general stores. Because citrus fruits like oranges and lemons were historically treated as prized winter luxuries, enjoying a piece of orange jelly candy was an affordable way for families to experience those bright, summery flavors all year round.
The Power of Food and Memory
The lingering popularity of the classic orange slice, as captured beautifully in 1000005441.jpg, lies in its cross-generational appeal. For older generations, it evokes memories of visits to grandparents who always kept a crystal dish filled with these treats on the coffee table. For younger food enthusiasts, it represents an appreciation for artisanal, small-batch candy making that honors traditional methods over industrial shortcut ingredients. Making them at home bridges this gap, turning a simple kitchen project into a sweet piece of edible history.
The Secret to the Perfect Jelly Texture: Pectin vs. Gelatin
When embarking on a homemade candy-making journey, the biggest hurdle is achieving that iconic “old-fashioned” texture: a clean bite that is neither too rubbery nor too gooey. To get this right, it helps to understand the science behind your gelling agents, as this choice will completely dictate the structural identity of your orange slices.
The Classic Approach: Fruit Pectin
Authentic old-fashioned jelly candies are traditionally made using powdered fruit pectin. Pectin is a natural structural carbohydrate found abundantly in the cell walls of fruits, particularly apples and citrus peels. When boiled with a precise ratio of sugar and acid, pectin forms a complex, three-dimensional grid that traps liquid, resulting in a soft, tender, and slightly jammy bite that cleanly shears when you chew it. This is the exact method used to create traditional French pâtes de fruits and high-end vintage confectionery. Bonus: using pectin keeps your candies 100% vegan and plant-based!
The Alternative Approach: Unflavored Gelatin
If you are looking for a slightly simpler, more forgiving setting agent that doesn’t require precise boiling temperatures, unflavored gelatin is an excellent alternative. Derived from collagen, gelatin creates a much more elastic, bouncy, and classic “gummy” texture. While a gelatin-based candy will be slightly chewier than the tender pectin-based vintage slices shown in 1000005441.jpg, it holds its shape beautifully at room temperature and is incredibly easy for beginners to work with. For the recipe below, we will feature a foolproof gelatin-and-cornstarch method that delivers a spectacular, crowd-pleasing soft chew.
Step-by-Step Homemade Old-Fashioned Orange Candy Recipe
This recipe yields a stunning batch of vibrant, crystal-coated orange jelly wedges that pack a punch of authentic citrus flavor. By combining real orange juice with a touch of fresh zest, we elevate this vintage treat into a gourmet homemade luxury.
Ingredients Profile
- 1 cup fresh-squeezed orange juice (pulp strained out)
- 2 tablespoons fresh lemon juice (to balance the sweetness and activate the set)
- 1 tablespoon fresh orange zest (finely grated)
- 1 ½ cups granulated sugar (plus extra for coating the finished candies)
- ½ cup water
- 3 tablespoons unflavored gelatin powder (or 2 tablespoons powdered citrus pectin if opting for a traditional jelly bite)
- Optional: A tiny drop of all-natural orange food coloring (for that iconic neon glow seen in 1000005441.jpg)
Essential Kitchen Tools
- A silicone crescent-shaped or wedge mold (Alternatively, an 8×4 inch baking pan lined with parchment paper)
- A medium, heavy-bottomed saucepan
- A candy thermometer (optional, but incredibly helpful)
- A fine-mesh strainer
- A wire whisk
Detailed Preparation Instructions
- Bloom the Gelatin: In a small bowl, pour in the ½ cup of water. Sprinkle the unflavored gelatin powder evenly over the surface of the water. Let it sit undisturbed for 5 to 10 minutes to “bloom”—this allows the gelatin granules to absorb the liquid thoroughly, ensuring a smooth, lump-free dissolve later on.
- Combine the Citrus Base: While the gelatin blooms, place your heavy-bottomed saucepan over medium heat. Pour in the strained orange juice, fresh lemon juice, and the finely grated orange zest. Stir gently until the mixture is warm.
- Dissolve the Sugar: Pour the 1 ½ cups of granulated sugar into the warm citrus juice. Whisk continuously until the sugar crystals have completely dissolved into the liquid, preventing any graininess. Bring the mixture to a gentle, low simmer.
- Integrate the Gelatin: Reduce the stove heat to low. Add the bloomed gelatin mass directly into the simmering orange syrup. Whisk vigorously for 3 to 4 minutes until the gelatin has completely melted and incorporated into the liquid. If you want an extra vibrant look, whisk in a single drop of natural orange coloring at this stage.
- Strain and Pour: Remove the saucepan from the heat. Pour the hot syrup through a fine-mesh strainer into a glass measuring cup; this step is crucial as it removes the orange zest pieces, leaving you with a crystal-clear, silky-smooth liquid. Carefully pour the strained liquid into your silicone molds. If using a baking pan, pour the liquid into the parchment-lined pan to a depth of about ½ inch.
- The Patience Phase (The Set): Leave the molds or pan undisturbed at room temperature until they cool completely. Once cool, transfer them to the refrigerator to chill and firm up for at least 4 hours, though letting them set overnight yields the best results.
- Slicing and Coating: Carefully unmold your candies. If you used a baking pan, lift the parchment paper out and use a sharp knife dipped in warm water to slice the jelly sheet into classic crescent wedges. Pour a generous amount of extra granulated sugar into a shallow bowl. Toss each orange slice thoroughly in the sugar until every side is completely coated in sparkling crystals.
Pro-Tips for Candy Making Success
To ensure your homemade confections turn out just as beautiful and mouthwatering as the ones featured in 1000005441.jpg, keep these expert candy-making tips in mind.
Preventing “Sweating” or Meltdown
One of the most common challenges with homemade jelly candy is a phenomenon called “sweating,” where the sugar coating pulls moisture out of the jelly, turning the outer layer into a sticky, syrupy mess. To prevent this, let your unmolded, sliced candies sit out on a piece of parchment paper at room temperature in a dry room for 12 to 24 hours before rolling them in sugar. This air-drying process forms a slight skin on the jelly, which locks in the moisture and ensures your sugar crystals stay dry, crisp, and beautifully intact.
Customizing Your Flavor Intensity
If you love an intensely tart candy, you can easily tweak this recipe to match your preference. Try adding ¼ teaspoon of food-grade citric acid to your coating sugar; this creates a spectacular sour-orange coating that perfectly offsets the sweet jelly core. Alternatively, you can swap out a portion of the orange juice for blood orange juice or tangerine juice to create a gorgeous, deep-crimson variation with a complex berry-citrus undertone.
Proper Storage and Serving
Because these homemade gems do not contain industrial preservatives or stabilizers, proper storage is key to extending their shelf life and maintaining that irresistible old-fashioned texture.
Keeping Them Fresh
Store your sugar-coated orange slices in a single layer inside an airtight glass jar or container, separating layers with sheets of wax or parchment paper to prevent them from sticking together. Keep the container in a cool, dark, and dry pantry. When stored correctly away from heat and humidity, your homemade old-fashioned candies will remain perfectly fresh, chewy, and delicious for up to two weeks. Avoid refrigerating the finished, sugar-coated candies, as the humidity inside a refrigerator will cause the exterior sugar crystals to dissolve.
Conclusion: Bringing a Sweet Tradition Back to Life
Making homemade old-fashioned orange candy is far more than just a fun kitchen experiment; it is an act of culinary preservation. It takes an iconic cultural symbol of comfort and joy—the timeless treat that so many recognize instantly from 1000005441.jpg—and rescues it from the world of artificial manufacturing. By using real, vibrant fruit juices and crafting them with your own hands, you create an incredibly special treat that honors the past while tasting vastly superior to anything you could find on a standard supermarket shelf. Whether you wrap them up in beautiful glass jars to give away as nostalgic holiday gifts, or keep a dish of them on your counter to brighten up your afternoon, these sparkling citrus slices are guaranteed to bring a smile to anyone who remembers the simple magic of the vintage candy counter.