The Ultimate Crispy Garlic Butter Baked Shrimp Recipe
There is something undeniably magical about the combination of succulent seafood and a golden, crunchy crust. When you think of gourmet appetizers or a centerpiece for a coastal-inspired dinner, shrimp often tops the list. However, finding the perfect balance between a juicy interior and a crisp, flavorful exterior can be a challenge for many home cooks. This Crispy Garlic Butter Baked Shrimp recipe is the answer to that culinary quest. It bridges the gap between high-end restaurant quality and the comforting simplicity of home-cooked meals. By utilizing a specialized breading technique and a high-heat baking method, you can achieve that sought-after “crunch” without the mess and added fats of traditional deep-frying.
Why This Baked Shrimp Recipe Works
Most people shy away from cooking shrimp because they fear the dreaded rubbery texture that comes with overcooking. This recipe solves that problem by using a high-temperature oven roast. This ensures that the shrimp cook quickly—locking in their natural juices—while the Panko-based breading transforms into a shattered-glass crisp. The inclusion of garlic butter provides a rich, aromatic base that infuses every bite with a savory depth. Unlike heavy batters that can slide off or become soggy, this crumb-based coating clings to the shrimp, creating a textured surface that catches every drop of lemon juice or dipping sauce you might pair it with.
The Science of the Perfect Crunch
Achieving the perfect crunch in the oven requires more than just tossing crumbs on seafood. It’s about moisture management. By patting the shrimp dry before starting, you ensure that the breading adheres properly rather than steaming off. Furthermore, using Panko breadcrumbs instead of traditional fine crumbs provides a larger surface area. These larger flakes stand up better to the heat and provide a more significant structural “snap.” When these flakes are toasted in the oven alongside the natural fats from the butter, they undergo a rapid Maillard reaction, resulting in that beautiful golden-brown color and complex flavor profile.
Health Benefits of Choosing Baked Over Fried
While we all love the taste of fried food, baking offers a significantly lighter alternative without sacrificing the sensory experience. By oven-roasting these shrimp, you use a fraction of the oil or butter required for deep or pan-frying. Shrimp themselves are an excellent source of lean protein, containing essential nutrients like selenium, vitamin B12, and iron. When paired with heart-healthy fats and fresh herbs, this dish becomes a nutritious addition to a balanced diet. It satisfies the craving for something indulgent while remaining light enough to serve as a frequent weeknight staple.
Ingredients for Crispy Garlic Butter Baked Shrimp
To create this masterpiece, you will need a handful of high-quality ingredients. Because shrimp has a mild flavor, the quality of your secondary ingredients—like the butter and garlic—truly shines through.
- Large Shrimp: Aim for 16-20 count shrimp, peeled and deveined. Leaving the tails on can make for a more elegant presentation and provides a natural “handle” for appetizers.
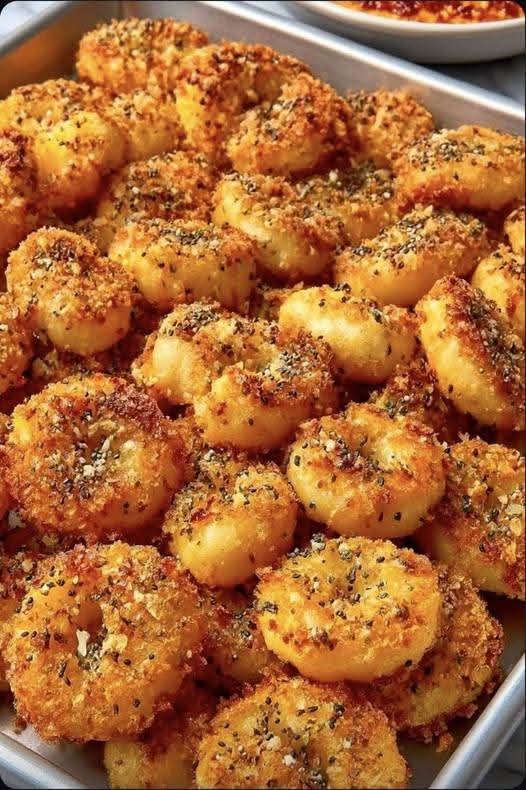
- Panko Breadcrumbs: These Japanese-style crumbs are essential for the superior texture shown in the photo.
- Unsalted Butter: This allows you to control the sodium levels. Melt it gently before use.
- Fresh Garlic: Minced very fine or pressed. Avoid the jarred stuff for this recipe; the bite of fresh garlic is irreplaceable.
- Lemon Zest: This adds a bright, citrusy lift that cuts through the richness of the butter.
- Dried Parsley or Oregano: To provide those beautiful green flecks and an earthy undertone.
- Red Pepper Flakes: Completely optional, but a pinch adds a subtle warmth that elevates the garlic.
- Salt and Black Pepper: For foundational seasoning.
Selecting the Right Shrimp
When shopping for shrimp, “fresh” isn’t always best. Unless you live near a coast where the boats are coming in daily, “flash-frozen” shrimp are often of higher quality. Most “fresh” shrimp at the counter have been previously frozen and thawed, meaning their shelf life is ticking away. Look for shrimp that are firm to the touch and have a mild, salty scent like the ocean. If they smell “fishy” or like ammonia, move on. Size matters here; larger shrimp are more forgiving in the oven and provide a better ratio of breading to meat.
Step-by-Step Instructions for Success
Preparing the Shrimp
Begin by thoroughly rinsing your shrimp under cold water. The most important step follows: drying. Use paper towels to pat each shrimp until bone-dry. If the shrimp are wet, the breading will turn into a paste rather than a crust. In a large bowl, whisk together your melted butter, minced garlic, lemon zest, and a pinch of salt. Toss the shrimp in this mixture until every curve is coated in garlic-scented gold.
The Breading Process
In a separate shallow dish, combine your Panko breadcrumbs with the dried herbs, black pepper, and any additional spices. Working with one shrimp at a time, press it firmly into the crumb mixture. You want to see the crumbs sticking to the butter coating. For an extra-thick crust, you can press the crumbs in twice, but usually, a single thorough coat is sufficient for that restaurant-style look.
The Baking Technique
Preheat your oven to 425°F (220°C). A high temperature is non-negotiable for this recipe. Line a large baking sheet with parchment paper or a silicone mat. Arrange the shrimp in a single layer, ensuring they aren’t touching. This allows the hot air to circulate around each piece, crisping the sides as well as the tops. Bake for 8 to 10 minutes, or until the shrimp are opaque and the breading is a deep golden brown.
Serving Suggestions and Pairings
This dish is incredibly versatile, making it suitable for a variety of dining occasions. Whether you are hosting a formal gathering or a casual family dinner, the presentation of these golden rounds is always a crowd-pleaser.
As an Appetizer
Serve these shrimp on a large platter with a side of homemade remoulade, a spicy cocktail sauce, or a simple garlic aioli. Garnish the plate with fresh lemon wedges and a sprinkle of chopped fresh parsley to add a pop of color. They are perfect for “dipping and socialing” because they hold their crunch even as they cool slightly.
As a Main Course
For a complete meal, serve the crispy shrimp over a bed of buttery angel hair pasta or a zesty lemon risotto. The crunch of the shrimp provides a fantastic textural contrast to the soft, creamy grains. If you are looking for a lower-carb option, these go beautifully with roasted asparagus or a crisp Caesar salad. The garlic butter notes in the shrimp naturally complement the parmesan and lemon found in classic salad dressings.
Tips for the Ultimate Golden Crust
- Don’t Overcrowd the Pan: If the shrimp are too close together, they will release steam, which softens the breading. Use two pans if necessary.
- Use a Wire Rack: For the absolute crispiest results, place a wire cooling rack on top of your baking sheet and arrange the shrimp on the rack. This allows heat to reach the bottom of the shrimp, eliminating any potential soggy spots.
- The Broiler Trick: If your shrimp are cooked through but the breading looks a little pale, turn on the broiler for the last 60 seconds. Watch them like a hawk, as the Panko can go from golden to burnt in a heartbeat.
- Butter Temperature: Ensure your melted butter has cooled slightly before tossing with the shrimp. If it’s boiling hot, it might start to “cook” the edges of the raw shrimp prematurely.
Frequently Asked Questions
Can I use an Air Fryer?
Absolutely. The air fryer is essentially a high-powered convection oven. Set your air fryer to 400°F and cook the shrimp for 5-7 minutes. Because of the intense airflow, you may need to lightly spray the breaded shrimp with a bit of olive oil spray to help the crumbs brown evenly.
How do I store and reheat leftovers?
Shrimp is best enjoyed immediately. However, if you have leftovers, store them in an airtight container in the fridge for up to two days. To reheat, avoid the microwave at all costs—it will turn the shrimp into rubber. Instead, place them in a 350°F oven or an air fryer for 3-4 minutes until they regain their crunch.
Can I make this gluten-free?
Yes. Simply swap the Panko breadcrumbs for a gluten-free Panko alternative or crushed gluten-free crackers. Many brands now offer high-quality GF breadcrumbs that provide an identical crunch to the original.
Conclusion: A New Kitchen Favorite
Mastering the art of the Crispy Garlic Butter Baked Shrimp is a rewarding experience for any home chef. It’s a dish that looks sophisticated and tastes complex, yet relies on simple techniques and accessible ingredients. By focusing on the details—drying the shrimp, using Panko, and maintaining a high oven temperature—you can produce a meal that rivals your favorite seafood shack or fine-dining establishment. This recipe isn’t just about feeding people; it’s about the joy of that first audible “crunch” and the burst of garlic-butter goodness that follows. Whether you’re celebrating a special occasion or simply elevating a Tuesday night, these shrimp are destined to become a permanent fixture in your recipe rotation. Grab your apron, preheat that oven, and get ready to enjoy the finest baked seafood you’ve ever made.