The Ultimate Walnut Cream Pie A Symphony of Richness and Crunch
Imagine a dessert where a flaky, buttery crust gives way to a layer of deep, caramelized toasted walnuts, which then surrenders to a luxuriously smooth and tangy cream cheese filling, all crowned with a cloud of lightly sweetened whipped cream. This is Walnut Cream Pie—a dessert that transcends the ordinary by marrying multiple textures and flavors into a single, show-stopping slice. Far more sophisticated than a standard nut pie, this creation elevates the humble walnut into the starring role, pairing its earthy, buttery crunch with the cool, rich silkiness of cream cheese custard. It’s a pie for celebrations, for holiday tables where you want to offer something uniquely decadent, and for anyone who believes that the perfect dessert should offer a little something with every single bite: crispness, creaminess, sweetness, and a satisfying nutty finish. In this comprehensive guide, we will deconstruct this masterpiece, providing foolproof methods for each layer, from toasting walnuts to perfection to achieving a filling that sets like a dream.
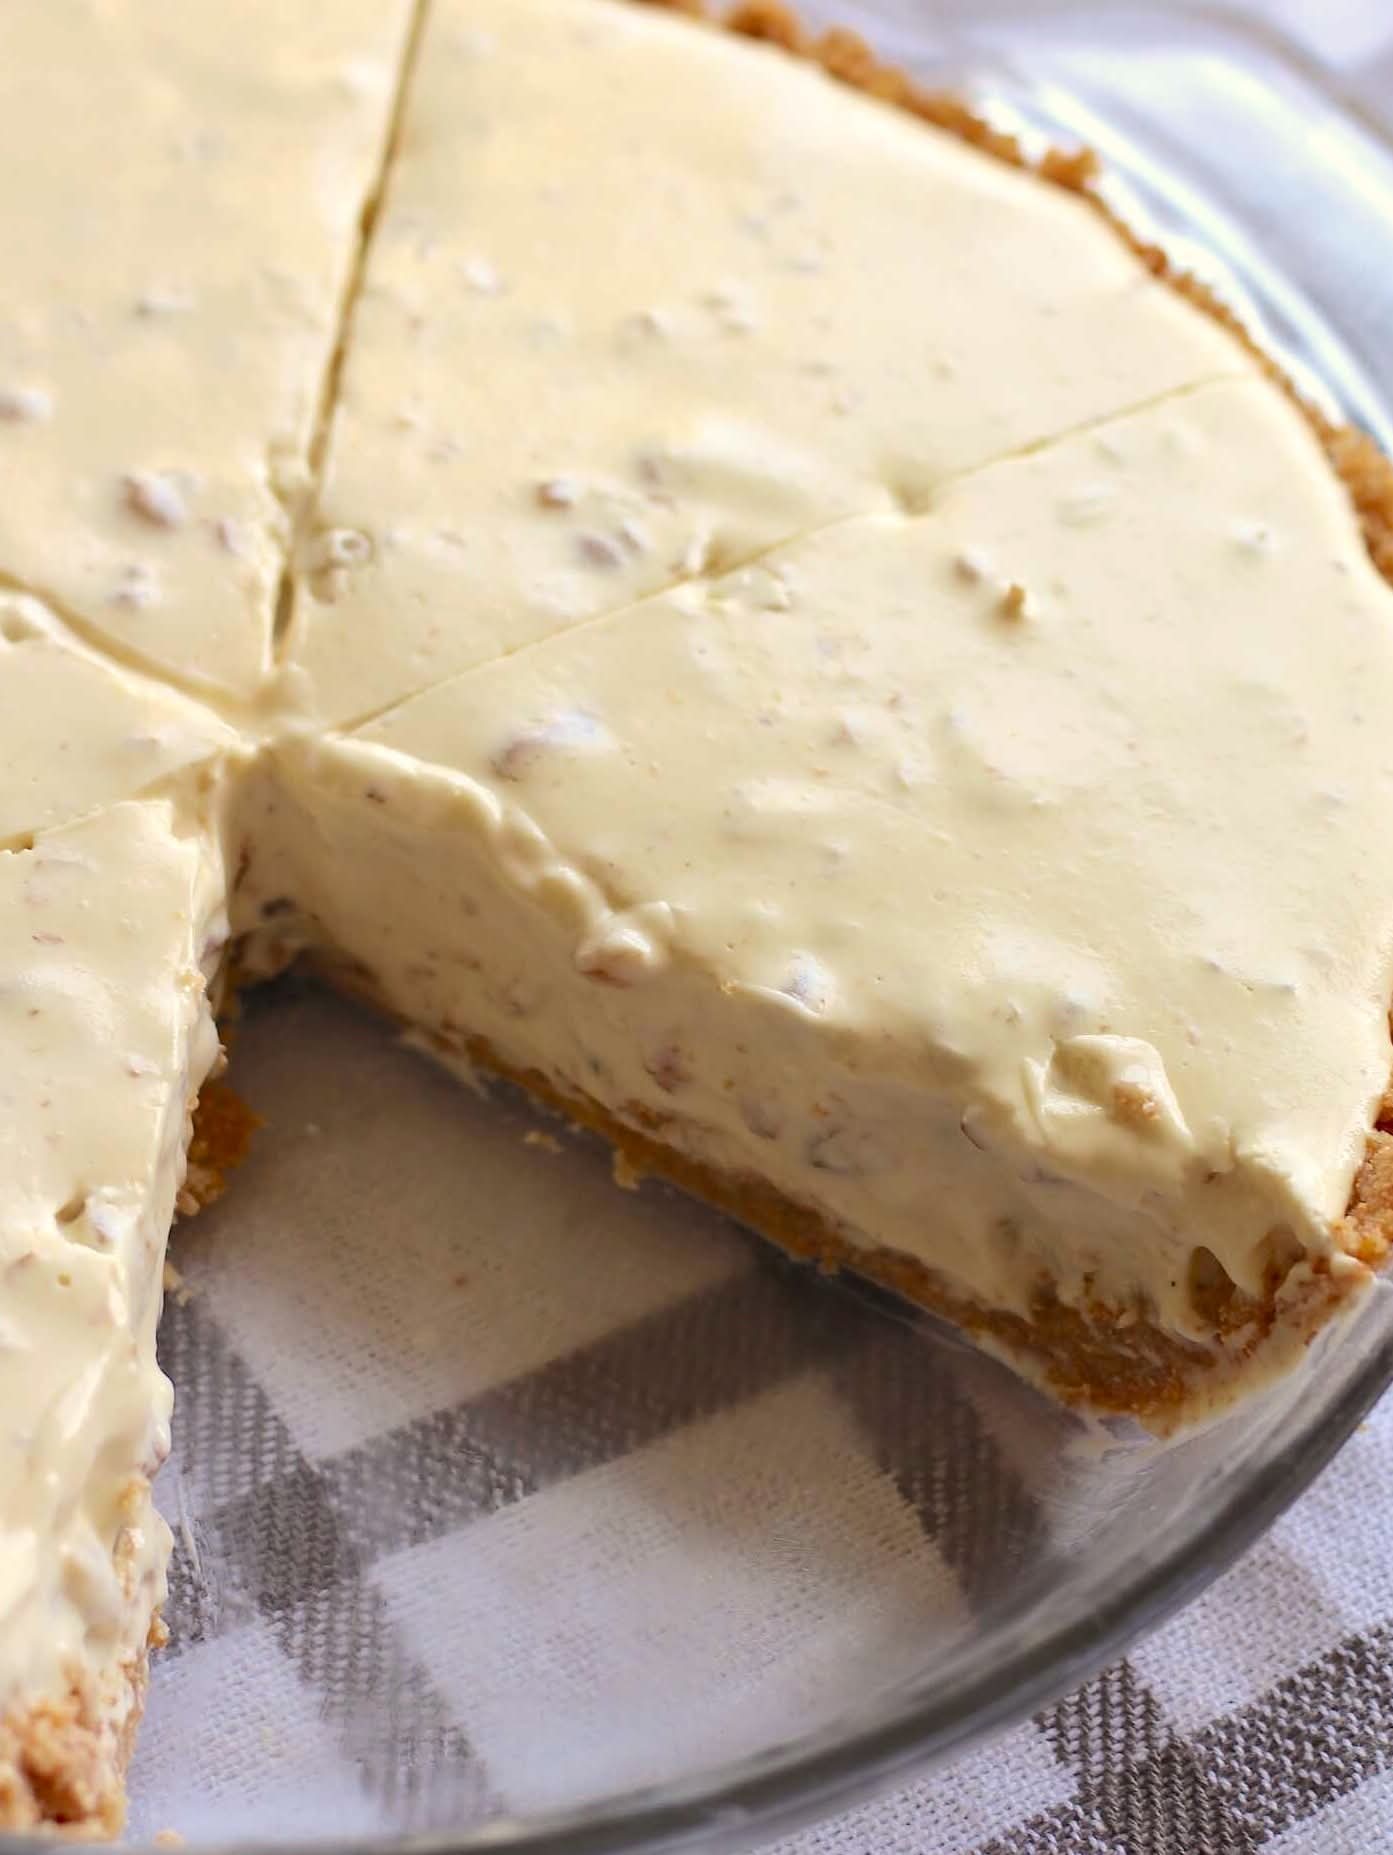
Decoding the Layers: Why This Pie is a Masterclass in Texture
A great pie is often about contrast, and Walnut Cream Pie is the textbook example. It is a harmonious assembly of distinct strata, each crucial to the overall experience. The base is a crisp, blind-baked pie crust that must be sturdy enough to support the weight of the filling without becoming soggy. Upon this foundation rests a dense, sticky layer of caramelized walnuts, which acts as both a flavor bomb and a barrier, sealing the crust from the creamy filling above. The heart of the pie is the cream cheese layer: not a cheesecake, but a lighter, silkier, poured custard enriched with cream cheese, which bakes to a firm yet velvety consistency. Finally, a billowy topping of fresh whipped cream and a garnish of more toasted walnuts provide a light, cool finish to the rich ensemble. Understanding the role of each component is the first step to baking it flawlessly.
Your Detailed Ingredient List: Building Blocks of Flavor
This recipe is broken down by component for clarity and success. For the best results, use full-fat dairy and fresh, high-quality walnuts.
For the Pie Crust:
· 1 homemade or store-bought 9-inch pie crust, fitted into a pie plate
· Pie weights or dried beans for blind baking
For the Walnut Layer:
· 1 ½ cups (150g) walnuts, finely chopped
· ⅓ cup (75g) packed light brown sugar
· ⅓ cup (80ml) light corn syrup or pure maple syrup
· 3 tablespoons unsalted butter, melted
· 1 large egg, lightly beaten
· ½ teaspoon vanilla extract
· Pinch of salt
For the Cream Cheese Filling:
· 8 oz (225g) full-fat cream cheese, softened to room temperature
· ½ cup (115g or 1 stick) unsalted butter, softened
· 1 ½ cups (300g) granulated sugar
· 4 large eggs, at room temperature
· 1 teaspoon pure vanilla extract
· 1 ½ teaspoons baking powder
· 1 ½ teaspoons baking soda
· 1 ½ cups (190g) all-purpose flour
· ½ cup (120ml) milk or buttermilk
For the Topping & Garnish:
· 1 cup (240ml) heavy whipping cream, cold
· 2 tablespoons powdered sugar
· ½ teaspoon vanilla extract
· ¼ cup (25g) walnut halves, lightly toasted, for garnish
Essential Equipment for Assembly
· 9-inch Deep-Dish Pie Plate
· Parchment Paper and Pie Weights for blind baking
· Food Processor (optional, for chopping walnuts)
· Electric Mixer (Hand or Stand) for the filling
· Multiple Mixing Bowls
· Whisk and Rubber Spatula
Methodical Construction: A Step-by-Step Guide to Perfection
This pie is built in stages, requiring patience and attention to detail. Do not rush the process.
Stage 1: Preparing and Blind Baking the Crust
Preheat your oven to 375°F (190°C). If using a homemade crust, roll it out and fit it into your 9-inch pie plate. Crimp the edges decoratively. Line the crust with parchment paper or foil and fill with pie weights or dried beans, ensuring they press into the sides. Blind bake for 15 minutes. Carefully remove the parchment and weights, then prick the bottom of the crust lightly with a fork. Return to the oven and bake for another 8-10 minutes, or until the crust is light golden brown and dry to the touch. Remove and set aside to cool. Reduce the oven temperature to 350°F (175°C).
Stage 2: Creating the Caramelized Walnut Barrier
While the crust cools, prepare the walnut layer. In a medium bowl, combine the finely chopped walnuts, brown sugar, corn syrup, melted butter, beaten egg, vanilla, and salt. Stir until all ingredients are thoroughly combined and the walnuts are evenly coated. Spread this mixture evenly over the bottom of the warm, pre-baked pie crust, pressing it down gently. Place the pie on a baking sheet (to catch any drips) and par-bake this layer for 15 minutes at 350°F (175°C). It will set, become fragrant, and darken slightly. Remove from the oven and let it cool while you prepare the cream cheese filling. This step seals the crust and creates the nutty foundation.
Stage 3: Mastering the Cream Cheese Filling
This is the heart of the pie. In the bowl of a stand mixer fitted with the paddle attachment, beat the softened cream cheese and butter together on medium speed until completely smooth, creamy, and lump-free, about 3 minutes. Gradually add the granulated sugar and beat until light and fluffy, another 2-3 minutes. Add the eggs one at a time, beating well after each addition and scraping down the bowl. Beat in the vanilla extract. In a separate bowl, whisk together the flour, baking powder, and baking soda. With the mixer on low speed, add the dry ingredients to the cream cheese mixture in three additions, alternating with the milk in two additions, beginning and ending with the flour mixture. Mix only until just combined after each addition; do not overmix.
Stage 4: Final Assembly and Baking
Carefully pour the cream cheese batter over the partially baked and cooled walnut layer in the pie crust. Smooth the top with a spatula. Bake at 350°F (175°C) for 45 to 55 minutes. The pie is done when the top is deep golden brown, the center is set, and a toothpick inserted into the center of the cream cheese layer (not the walnut layer) comes out clean or with a few moist crumbs. The filling may puff up slightly due to the leavening agents; it will settle as it cools. If the crust or top browns too quickly, tent the pie loosely with aluminum foil for the last 15-20 minutes of baking.
Stage 5: The Crucial Chill and Final Garnish
This step cannot be overstated. The pie must cool completely at room temperature on a wire rack for at least 2 hours, then be refrigerated for a minimum of 4 hours, preferably overnight. This allows the cream cheese filling to set firmly, making it sliceable. Just before serving, make the whipped cream topping: In a chilled bowl, beat the cold heavy cream, powdered sugar, and vanilla until medium-stiff peaks form. Pipe or dollop the whipped cream over the entire cooled pie. Garnish with the reserved toasted walnut halves. Slice with a sharp, thin knife dipped in hot water for clean cuts.
Pro Tips for an Unbeatable Walnut Cream Pie
· Toast Your Walnuts: For maximum flavor, toast the walnuts for both the layer and the garnish on a dry baking sheet at 350°F for 8-10 minutes before chopping. Let them cool completely.
· Room Temperature is Key: Ensure your cream cheese, butter, and eggs are truly at room temperature to prevent a lumpy filling and ensure even baking.
· The Double-Bake Method: Par-baking the walnut layer is non-negotiable. It prevents it from becoming soggy and mixing into the cream cheese filling during the final bake.
· Patience Pays: Rushing the cooling and chilling steps will result in a