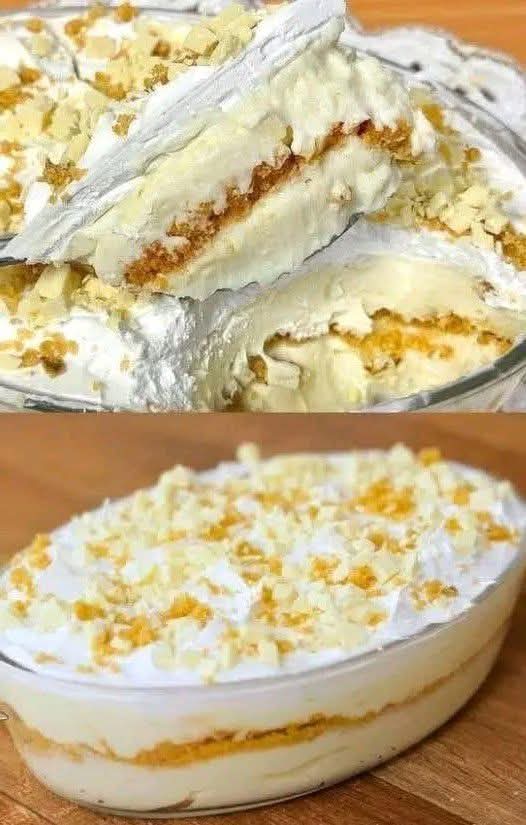
Dreamy No Bake Creamy Biscuit Dessert A 15 Minute Miracle
Imagine this: layers of buttery biscuits, a velvety cream so rich it tastes like cheesecake, a whisper of vanilla, and a crown of fresh berries or a drizzle of caramel—all coming together in a stunning dessert that requires zero oven time. This is the magic of the Creamy No-Bake Biscuit Dessert, a phenomenon known across continents by many names. In some places, it’s a beloved “Icebox Cake”; in others, a “No-Bake Cheesecake” or “Biscuit Delight.” Whatever you call it, this dessert is the ultimate answer to the need for an impressive, crowd-pleasing sweet that’s deceptively simple to make. It’s perfect for hot summer days when baking is unthinkable, for last-minute guests, or for when a creamy, comforting treat is calling your name. In this guide, we’ll master the art of this no-bake wonder, exploring its components, secrets for perfect texture, and endless flavor variations. Prepare to create a dessert that looks like you spent all day in the kitchen, while actually spending just 15 minutes assembling it.
The Allure of the No-Bake Dessert: Why This Recipe Wins
In a world of complex patisserie and intricate baking techniques, the no-bake biscuit dessert holds a special, unrivaled place. Its brilliance lies in its elegant simplicity and its transformative process. The star of the show is the humble tea biscuit or ladyfinger, which, after hours of resting in the refrigerator nestled between layers of cream, undergoes a magical metamorphosis. It softens to a cake-like tenderness, absorbing the flavors of the cream while still retaining a delicate structure. The result is a dessert that mimics the experience of a layered cake or cheesecake but with a fraction of the effort and no risk of over-baking. It’s endlessly adaptable, inherently make-ahead, and virtually foolproof. This dessert caters to every possible user intent: it’s a quick fix, a showstopper, a childhood nostalgia trip, and a blank canvas for creativity all in one.
Deconstructing the Magic: Your Core Ingredients
The foundation of this dessert is beautifully simple, relying on a harmony of textures and flavors. Using high-quality ingredients here makes a noticeable difference in the final result.
For the Cream Filling:
· 2 cups (480ml) heavy whipping cream, very cold
· 8 oz (225g) full-fat cream cheese, softened to room temperature
· 1 cup (120g) powdered sugar (confectioners’ sugar), sifted
· 1 teaspoon pure vanilla extract
· Optional: Zest of 1 lemon for a bright note
For the Assembly:
· 1 (14-16 oz) package of crisp, dry biscuits (Choose based on your style: Graham crackers, digestive biscuits, Italian ladyfingers (savoiardi), or plain tea biscuits)
· 1-1.5 cups of liquid for dipping (Choose: whole milk, a mix of milk and espresso for a tiramisu twist, or a fruit juice like orange or berry)
· Optional Fillers & Toppings: Fresh berries (strawberries, raspberries, blueberries), sliced bananas, crushed cookies, chocolate shavings, fruit preserves, caramel or chocolate sauce, toasted nuts, or a dusting of cocoa powder.
Essential Equipment for Effortless Assembly
You don’t need any special equipment, but a few kitchen basics will ensure ease and perfection:
· Electric Mixer (Hand or Stand): Crucial for achieving stable, stiff peaks in your whipped cream.
· Large Mixing Bowls: One for the cream mixture, one for whipping cream if doing separately.
· Rubber Spatula: For gentle folding.
· 9×9 or 7×11 Inch Baking Dish or a Springform Pan: A dish with high sides is ideal for creating distinct layers. A springform pan makes for a beautiful, clean presentation.
· Measuring Cups and Spoons.
Master Technique: Crafting the Perfect No-Bake Dessert
The process is a joy—more about assembly than arduous cooking. Precision in each step guarantees a dessert with perfect texture and definition.
Step 1: Building the Foundation – The Cream
The stability and flavor of your cream layers are paramount. Here is the fail-proof method. In a large bowl, use your electric mixer to beat the cold heavy whipping cream on medium-high speed until stiff peaks form. Be careful not to overbeat into butter. Scoop this whipped cream into a separate bowl and set aside. No need to wash the mixer bowl! In the same bowl, beat the softened cream cheese until it is completely smooth and lump-free, about 2 minutes. Add the sifted powdered sugar and vanilla extract (and lemon zest, if using) and beat again until fully combined and creamy. Now, take your rubber spatula and gently fold the reserved whipped cream into the cream cheese mixture. Use a broad, sweeping motion to incorporate them fully while maintaining as much air as possible. This combination gives you the tangy depth of cheesecake with the light, airy texture of whipped cream. Your dream filling is ready.
Step 2: The Art of Assembly – Layering for Success
This is where you create the signature structure. Have your chosen liquid for dipping ready in a shallow bowl or plate. Briefly dip each biscuit into the liquid—just a quick 1-2 second immersion to moisten it, not saturate it. If using ladyfingers, be especially swift, as they dissolve quickly. Arrange a single, tight layer of the dipped biscuits in the bottom of your chosen dish, breaking some to fill any gaps. Next, spread a generous layer of your creamy filling over the biscuits, using about one-third of the mixture. Smooth it into an even layer. If you are adding a layer of fresh fruit or preserves, scatter a thin layer over the cream now. Repeat the process: another layer of quickly dipped biscuits, another layer of cream (and optional filler), and a final layer of biscuits. Finish with the last of the cream mixture as your top layer. Smooth the top beautifully with your spatula.
Step 3: The Crucial Chill – Letting Time Do the Work
This is the non-negotiable, most critical step. Cover the dessert tightly with plastic wrap, ensuring it touches the surface of the cream to prevent a skin from forming. Refrigerate for a minimum of 6 hours, but ideally overnight (12 hours). This chilling period is when the magic happens. The biscuits soften completely, absorbing moisture and flavor to become tender and cake-like, while the cream filling sets firmly, allowing you to cut clean slices. Rushing this step will result in a crunchy, disjointed dessert.
Step 4: The Grand Finale – Topping and Serving
Just before serving, add your toppings. This keeps elements like fresh berries vibrant and biscuits crunchy. Pile high with seasonal fruit, drizzle lavishly with chocolate or caramel sauce, sprinkle with crushed cookies or nuts, or simply dust with cocoa powder. To serve, use a sharp knife dipped in hot water and wiped clean for pristine slices. The dessert should hold its shape beautifully, revealing perfect, defined layers.
Flavor Galaxy: Endless Variations to Try
The basic recipe is a launchpad for limitless creativity. Here are some beloved themes to transform your dessert.
Classic Tiramisu Style
Use Italian ladyfingers (savoiardi). Dip them in a mixture of 1 cup strong cooled espresso and 2 tablespoons of coffee liqueur or rum (optional). Add 1 tablespoon of unsweetened cocoa powder to the cream filling. Layer as directed. Top with a dusting of cocoa powder and chocolate shavings.
Summer Berry Bliss
Use plain tea biscuits or graham crackers dipped in a little milk. Fold 1 cup of mixed fresh raspberries and blueberries into the cream filling itself. Layer with additional whole berries. Top with a vibrant berry compote and fresh mint.
Chocolate Caramel Indulgence
Use chocolate-flavored biscuits. Dip in milk. Add ½ cup of sifted cocoa powder to the cream cheese mixture before folding in the whipped cream. Layer with a drizzle of store-bought or homemade caramel sauce between layers. Top with whipped cream, caramel drizzle, and sea salt flakes.
Tropical Paradise
Use plain or coconut biscuits. Dip in a mix of coconut milk and a splash of pineapple juice. Add 1 cup of finely diced fresh pineapple and toasted shredded coconut to the cream filling. Top with more toasted coconut and slices of mango or kiwi.
Pro Tips for Unbeatable Results
· Cream Cheese is Key: Ensure it is fully softened. Cold cream cheese will leave lumps that you cannot beat out, ruining the smooth texture.
· Cold Cream for Stability: Your heavy cream must be straight from the fridge. A cold bowl and beaters can help, too. This ensures it whips quickly and holds its structure.
· The Dip Test: The dipping liquid is for moisture, not flavor saturation. A quick dip is all you need. If the biscuits become too soft, they will turn to mush in the dessert.
· Make it Ahead: This dessert’s flavor and texture only improve with time, making it the perfect do-ahead dish for parties and gatherings.
· Experiment with Shapes: Use individual glasses or mason jars for personal, portable portions. Layer directly in the glass for a stunning visual effect.
Conclusion: Your New Go-To Dessert Masterpiece
The Creamy No-Bake Biscuit Dessert is more than just a recipe; it’s a revelation in simplicity and satisfaction. It proves that you don’t need advanced skills or hours of baking to create something truly memorable and delicious. It’s a testament to the power of patience (that chilling time!) and the beauty of humble ingredients transformed. Whether you stick to the classic vanilla and berry version or embark on a chocolate-hazelnut or lemon-blueberry adventure, this dessert promises a creamy, dreamy, texturally perfect bite every single time. So, the next time a sweet craving strikes or guests are on their way, bypass the oven and reach for the biscuits and cream. Your fridge is about to become the secret weapon in your dessert arsenal, producing a treat that is guaranteed to draw requests for the recipe and empty plates every time.