The Ultimate Guide to Classic Homemade Slab Apple Pie
Apple pie is more than just a dessert; it is a timeless symbol of comfort and tradition. While a standard round pie is a staple at many dinner tables, the slab apple pie has gained immense popularity for its ability to feed a crowd and its perfect crust-to-filling ratio. This oversized, rectangular version of the classic American dessert features a flaky, buttery double crust packed with tender, cinnamon-spiced apples. Whether you are hosting a large family gathering, a backyard barbecue, or a holiday feast, this recipe is designed to deliver consistent, mouthwatering results every time. In this comprehensive guide, we will walk you through the nuances of selecting the right apples, mastering the pastry dough, and achieving that golden-brown finish that makes this dessert truly irresistible.
Why Slab Apple Pie is a Game Changer for Bakers
The transition from a circular pie dish to a rectangular baking sheet offers several practical advantages that every home cook should appreciate. First and foremost is the yield. A standard slab pie can easily serve 12 to 16 people, making it far more efficient than baking multiple round pies. Furthermore, the shallow depth of a baking sheet allows the filling to cook more evenly and prevents the bottom crust from becoming soggy—a common pitfall in deep-dish pies. The increased surface area also means more opportunities for that crisp, glazed top crust that everyone loves. When you slice into a slab pie, you get neat, manageable squares that are much easier to serve and eat at casual events compared to delicate wedges.
Choosing the Best Apples for Your Filling
The success of any apple pie depends heavily on the fruit you choose. You want a variety that holds its shape under heat rather than turning into applesauce. Granny Smith apples are the industry standard because their tartness provides a beautiful contrast to the sugar and cinnamon. However, for a more complex flavor profile, many bakers prefer a blend. Mixing Granny Smith with Honeycrisp or Braeburn adds a touch of natural sweetness and different textures. Avoid softer varieties like Red Delicious or Gala for baking, as they tend to become grainy and lose their structural integrity in the oven. For this slab pie, we recommend peeling and slicing the apples thinly (about 1/4 inch) to ensure they stack tightly and cook through perfectly.
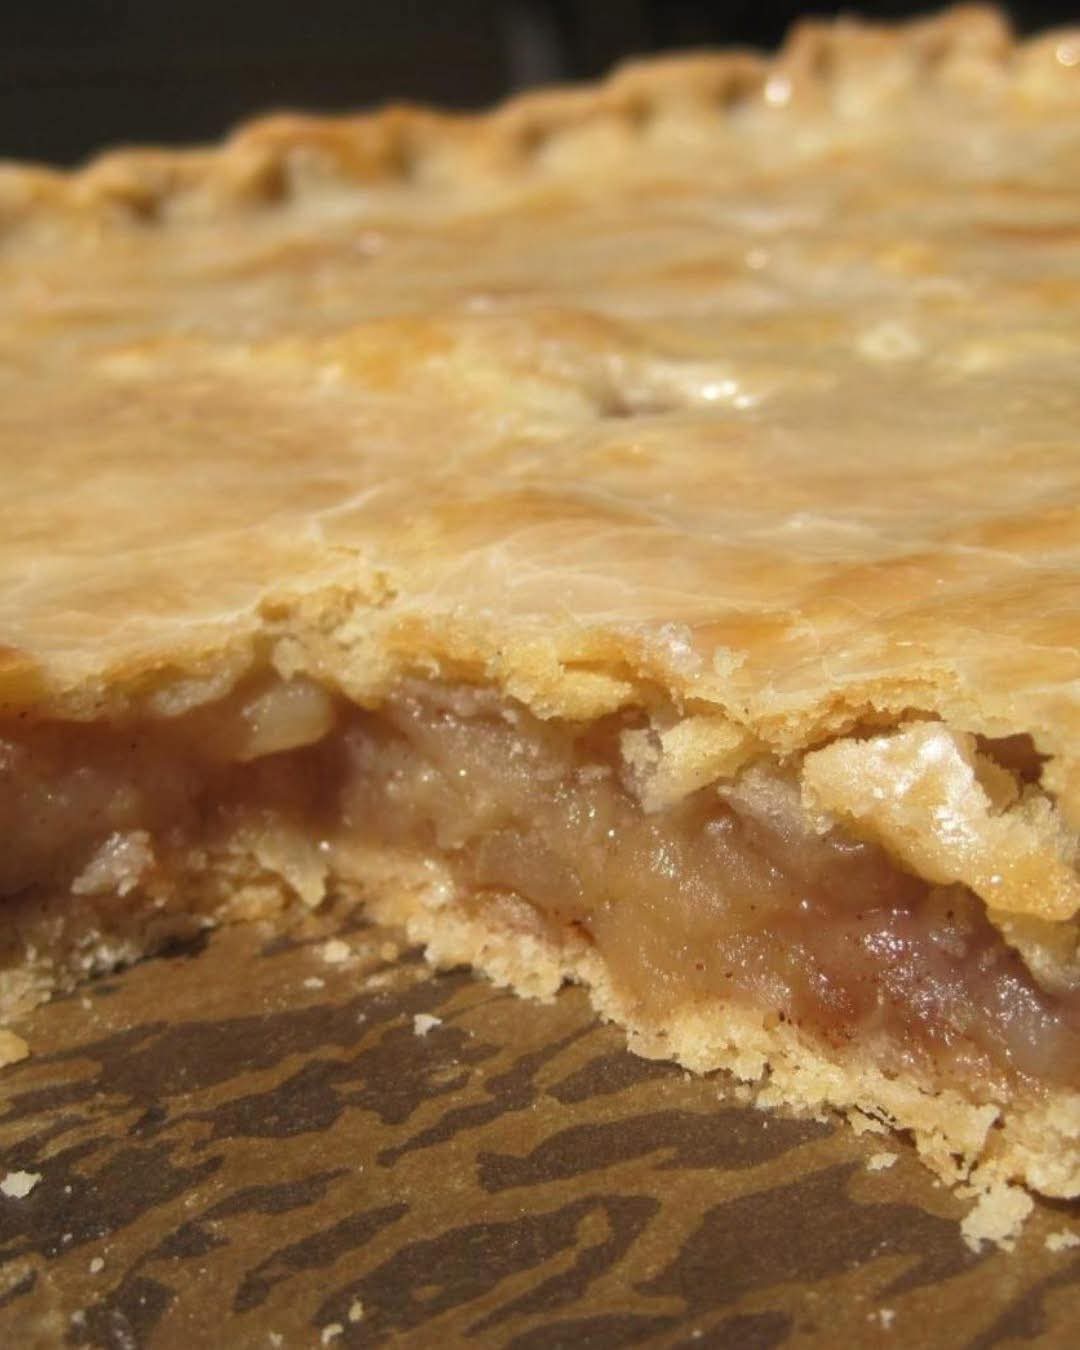
The Secret to an Extra Flaky Pastry Crust
A slab pie requires a significant amount of dough, and the key to a tender, flaky result is temperature control. Use ice-cold butter and ice water to ensure the fats don’t melt before the pie hits the oven. When the cold bits of butter meet the high heat of the oven, they create steam pockets, which result in those coveted layers of flake. For a large slab pie, a combination of butter and shortening can be beneficial; butter provides the flavor, while shortening offers a higher melting point, making the dough easier to handle and ensuring the decorative edges stay sharp. Don’t overwork the dough—mix it just until it comes together to avoid developing too much gluten, which can make the crust tough.
Ingredients for the Perfect Slab Apple Pie
To create this masterpiece, you will need high-quality ingredients that work in harmony. This recipe is scaled for a standard 10×15-inch jelly roll pan or a similar rimmed baking sheet.
For the Crust:
- 5 cups all-purpose flour
- 2 tablespoons granulated sugar
- 1 1/2 teaspoons salt
- 1 cup (2 sticks) unsalted butter, chilled and cubed
- 1 cup vegetable shortening, chilled
- 3/4 to 1 cup ice-cold water
- 1 large egg (for the egg wash)
- Coarse sparkling sugar (for topping)
For the Apple Filling: - 4 pounds of firm baking apples (about 8-10 large apples), peeled, cored, and sliced
- 1 cup granulated sugar
- 1/2 cup packed light brown sugar
- 1/4 cup cornstarch (to thicken the juices)
- 2 teaspoons ground cinnamon
- 1/4 teaspoon ground nutmeg
- 1/4 teaspoon salt
- 1 tablespoon lemon juice
- 2 tablespoons unsalted butter, cut into small pieces
Step-by-Step Instructions: Preparing the Crust
Preparing the dough ahead of time is essential for the best texture. Start by whisking the flour, sugar, and salt in a very large bowl. Using a pastry cutter or two knives, work the cold butter and shortening into the flour until the mixture resembles coarse crumbs with some pea-sized chunks of fat remaining. Gradually drizzle in the ice water, one tablespoon at a time, tossing with a fork until the dough begins to clump together. Divide the dough into two pieces—one slightly larger for the bottom crust (about 60%) and one for the top (40%). Shape them into flat rectangles, wrap them tightly in plastic wrap, and refrigerate for at least one hour or up to two days.
Rolling and Fitting the Bottom Layer
Once the dough has chilled, lightly flour your work surface. Take the larger portion of dough and roll it out into a rectangle that is roughly 2 inches larger than your baking sheet on all sides (approximately 12×17 inches). To transfer the dough without tearing, loosely roll it around your rolling pin and unroll it over the pan. Gently press the dough into the corners and up the sides, letting the excess hang over the edges. Place the pan back in the refrigerator while you prepare the filling; keeping the dough cold is the best way to prevent shrinking during the bake.
Preparing the Spiced Apple Filling
In a massive mixing bowl, combine your sliced apples with the lemon juice to prevent browning. In a separate small bowl, whisk together the granulated sugar, brown sugar, cornstarch, cinnamon, nutmeg, and salt. Pour the sugar mixture over the apples and toss thoroughly until every slice is evenly coated. Let the mixture sit for about 10 to 15 minutes. This allows the apples to macerate slightly and release some of their juices, which will be thickened by the cornstarch during the baking process to create a luscious, jammy sauce.
Filling the Pie and Adding the Top Crust
Remove your prepared bottom crust from the fridge. Arrange the apple slices in the pan, spreading them out as evenly as possible to create a flat surface. Avoid leaving large gaps, as the apples will shrink during baking. Pour any remaining juice from the bowl over the fruit and dot the top with the 2 tablespoons of cubed butter. Roll out the second piece of dough into a slightly smaller rectangle (about 11×16 inches). Carefully place it over the apples. Fold the overhanging bottom crust over the top crust and pinch the edges together to create a tight seal. You can crimp the edges with a fork or your fingers for a decorative look.
Baking to Golden Perfection
Preheat your oven to 375°F (190°C). Before the pie goes in, whisk the egg with a tablespoon of water and brush it liberally over the entire top crust. This egg wash is what creates that beautiful, shiny, golden-brown sheen. Use a sharp knife to cut several slits in the top crust to allow steam to escape. Sprinkle the top generously with coarse sparkling sugar for an added crunch and a professional finish. Place the baking sheet on the middle rack of the oven. Bake for 45 to 55 minutes, or until the crust is deeply golden and you can see the fruit juices bubbling through the vents.
Cooling and Serving Tips
The hardest part of making a slab apple pie is waiting for it to cool. It is crucial to let the pie rest for at least 1 to 2 hours before slicing. This cooling period allows the filling to set; if you cut into it too early, the juices will run out, and the bottom crust may lose its crispness. Slab pie is best served at room temperature or slightly warm. For the ultimate experience, serve each square with a generous scoop of vanilla bean ice cream or a dollop of freshly whipped cream. If you have leftovers, they can be stored at room temperature for up to two days or refrigerated for up to five days. You can easily reheat individual squares in a 350°F oven for about 10 minutes to restore the crust’s flakiness.
Conclusion: The Ultimate Crowd-Pleaser
Mastering the slab apple pie is a rewarding endeavor that elevates your baking repertoire. It combines the nostalgic flavors of a traditional pie with the practicality of a modern sheet-pan meal. By focusing on high-quality ingredients, maintaining cold temperatures for your pastry, and allowing the pie enough time to set, you ensure a dessert that is as beautiful as it is delicious. This recipe isn’t just about feeding a lot of people; it’s about providing a consistent, high-quality slice of comfort that highlights the natural beauty of the apple. Whether it’s for a holiday or a simple Sunday dinner, this slab apple pie is destined to become a requested favorite in your household.