The Ultimate Guide to 3 Ingredient Drop Biscuits: Fluffy Golden and Foolproof
There is nothing quite like the aroma of fresh biscuits wafting through the kitchen on a lazy Sunday morning. For many home cooks, the idea of making biscuits from scratch conjures up images of flour-dusted countertops, cold butter being meticulously cut into flour, and the high-stress ritual of folding dough just enough—but not too much—to achieve those elusive layers. However, the 3-ingredient drop biscuit changes the game entirely. This recipe is the ultimate kitchen hack for anyone who craves homemade comfort food but lacks the time or patience for traditional pastry methods. By stripping the process down to its most essential elements, we unlock a method that is not only faster but arguably more consistent for the average baker. These biscuits are craggy on the outside, tender on the inside, and infused with a rich, buttery flavor that belies their simplicity. Whether you are a seasoned culinary creator or a beginner looking for a win, this recipe is designed to deliver bakery-quality results with minimal effort. In this comprehensive guide, we will explore the science behind these three simple ingredients, the techniques to ensure maximum fluffiness, and how to adapt this base recipe for any meal of the day.
Why 3-Ingredient Drop Biscuits are a Game Changer
The beauty of the drop biscuit lies in its “shaggy” nature. Unlike rolled biscuits, which require a specific protein structure and temperature control to maintain distinct layers, drop biscuits rely on a higher moisture content and a simpler mixing process. This makes them incredibly forgiving. You don’t need a rolling pin, a biscuit cutter, or even a clean countertop. Everything happens in one bowl, and the “drop” method ensures that you don’t overwork the gluten, which is the primary culprit behind tough, hockey-puck biscuits. By using just self-rising flour, heavy cream (or buttermilk and butter), and a touch of extra fat, you create a chemical reaction that results in immediate lift and a moist crumb. This efficiency is why this specific recipe has become a staple for busy families and professional food bloggers alike. It respects your time without sacrificing the soul-warming experience of a warm bread roll.
The Science of the “Drop” Method
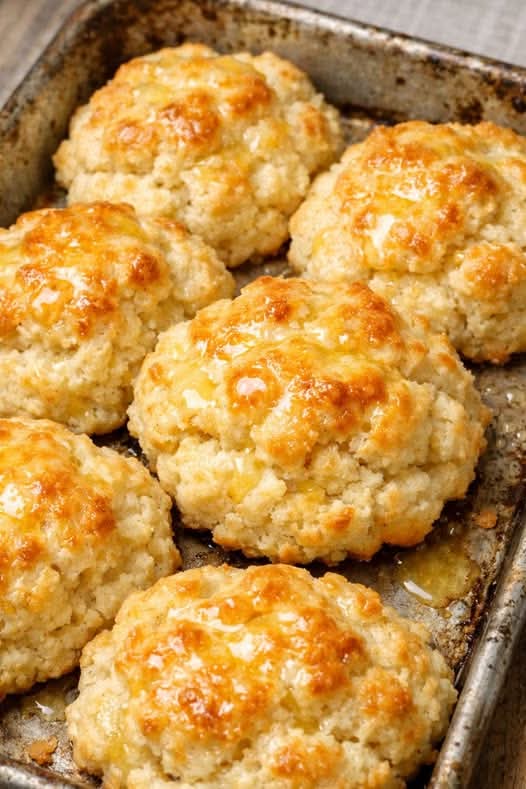
Traditional biscuits require “lamination,” a process of creating layers of fat and dough. Drop biscuits, however, use a wetter dough that creates steam pockets as it bakes. Because the dough is dropped rather than rolled, the surface area is uneven. These crags and peaks catch the heat of the oven, creating a delightful crunch on the exterior while the interior remains soft. This texture is highly sought after because it provides a better vessel for honey, jam, or sausage gravy to cling to. From a technical standpoint, the lack of handling means the fats stay cold right up until they hit the oven, which is the secret to a high rise.
Essential Ingredients for the Perfect Biscuit
To achieve greatness with only three items, the quality and type of those ingredients are paramount. You cannot simply swap them out without understanding their function.
Self-Rising Flour: The All-in-One Powerhouse
The backbone of this recipe is self-rising flour. This is not just regular all-purpose flour; it is a precisely calibrated blend of low-protein flour, baking powder, and salt. The baking powder provides the leavening agent necessary for the biscuits to double in size, while the salt enhances the flavor of the grain. Using self-rising flour eliminates the risk of unevenly distributed leavening, which can lead to bitter spots or flat biscuits. If you find yourself in a pinch without it, you can mimic the blend by whisking together one cup of all-purpose flour with 1.5 teaspoons of baking powder and 0.5 teaspoons of fine salt.
Heavy Whipping Cream: The Secret to Tenderness
Most traditional recipes call for cold butter and buttermilk. However, heavy whipping cream is essentially a stabilized emulsion of butterfat and milk. By using heavy cream as your liquid component, you are adding both the fat and the moisture in one step. The high fat content in the cream coats the flour proteins, preventing them from forming long gluten strands, which ensures the biscuit remains tender. Furthermore, the natural sugars in the cream caramelize in the oven, giving these biscuits their signature golden-brown hue.
Salted Butter: The Finishing Touch
While the cream provides plenty of moisture, a golden wash of melted salted butter on top is what elevates these from “good” to “unforgettable.” Brushing the biscuits immediately after they exit the oven allows the salt to penetrate the crust and provides a rich, savory finish that balances the slight sweetness of the cream.
Step-by-Step Instructions for Success
Preparing Your Station
Preheat your oven to 450°F (232°C). High heat is non-negotiable for biscuits; it creates the initial “oven spring” where the moisture turns to steam and pushes the dough upward. Line a heavy-duty baking sheet with parchment paper or a silicone mat. This prevents the bottoms from scorching before the tops are golden.
Mixing the Shaggy Dough
In a large mixing bowl, add 2 cups of self-rising flour. Make a well in the center and pour in 1.5 cups of cold heavy whipping cream. Using a sturdy spatula or a wooden spoon, gently fold the cream into the flour. Stop mixing as soon as no dry streaks of flour remain. The dough should look messy and slightly lumpy. If you over-mix until the dough is smooth, you will end up with tough bread instead of tender biscuits.
The Art of the Drop
Using a large spoon or a spring-loaded ice cream scoop, portion the dough onto your prepared baking sheet. Aim for about 1/4 cup of dough per biscuit. Do not smooth the tops; those rough edges are where the flavor lives. Space them about 2 inches apart to allow for airflow, or if you prefer soft-sided biscuits, place them closer so they touch as they rise.
Baking to Golden Perfection
Slide the tray into the center rack of the oven. Bake for 12 to 15 minutes. You are looking for a deep golden brown on the peaks and a light golden color on the sides. While they bake, melt 2 tablespoons of salted butter.
The Final Glaze
The moment the biscuits come out, brush them generously with the melted butter. Let them rest on the pan for 5 minutes. This resting period is crucial as it allows the internal steam to settle, finishing the cooking process without drying out the crumb.
Pro Tips for Culinary Excellence
To ensure your 1500-word-worthy results every time, keep these professional tips in mind. First, always use cold ingredients. Even though we aren’t cutting in solid butter, keeping the cream chilled ensures the dough doesn’t become too sticky and helps with the rise. Second, check your flour’s expiration date. Since self-rising flour contains baking powder, it has a shorter shelf life than plain flour. If the leavening agent is old, your biscuits will stay flat. Finally, don’t be afraid of the heat. A cool oven results in a dry, pale biscuit.
Common Mistakes to Avoid
One common error is measuring the flour incorrectly. Always fluff your flour with a spoon and level it off in the measuring cup rather than scooping directly from the bag, which packs the flour down and leads to a dry dough. Another mistake is using “half and half” instead of heavy cream. Half and half does not have enough fat to replace the butter component, leading to a lean, tough texture.
Creative Variations and Add-ins
Once you have mastered the base 3-ingredient recipe, you can use it as a canvas for various flavors.
Savory Additions
For a “Red Lobster” style copycat, fold in 1/2 cup of shredded sharp cheddar cheese and 1/4 teaspoon of garlic powder to the dry flour before adding the cream. You can also add chopped chives, crumbled bacon, or cracked black pepper for a sophisticated brunch side.
Sweet Twists
To turn these into a dessert or a sweet breakfast treat, add 2 tablespoons of sugar to the flour. After baking and buttering, sprinkle the tops with cinnamon sugar. These also make an incredible base for strawberry shortcake; simply split them open and load them with macerated berries and whipped cream.
Serving Suggestions
These biscuits are incredibly versatile. Serve them alongside a hearty beef stew to soak up the broth, or use them as the base for a breakfast sandwich with a folded egg and sausage patty. They are equally at home on a holiday dinner table as they are at a casual backyard barbecue. Because they are so quick to make, you can whip them up last minute whenever you feel a meal is missing that “extra something.”
Storage and Reheating
While these are best served fresh, you can store leftovers in an airtight container for up to two days. To reheat, avoid the microwave, which can make them rubbery. Instead, place them in a 350°F oven for 5 to 7 minutes until the exterior regains its crunch. You can also freeze the unbaked dough balls on a tray and then transfer them to a freezer bag. Bake them straight from frozen, adding an extra 3 to 5 minutes to the bake time.
Conclusion
The 3-ingredient drop biscuit is a testament to the fact that great cooking doesn’t have to be complicated. By focusing on the quality of your ingredients and respecting the simple physics of baking, you can produce a result that rivals any traditional recipe. This method removes the barrier of entry for home bakers, allowing anyone to bring the warmth and joy of homemade bread to their table. Whether you are prepping a massive brunch for friends or just want a quick side for a weeknight dinner, these biscuits are a reliable, delicious, and efficient solution. Master this simple ratio, and you will find yourself reaching for the flour and cream time and time again, confident in the knowledge that a perfect, golden biscuit is only 15 minutes away. Comfort food should be accessible, and with this recipe, it truly is.