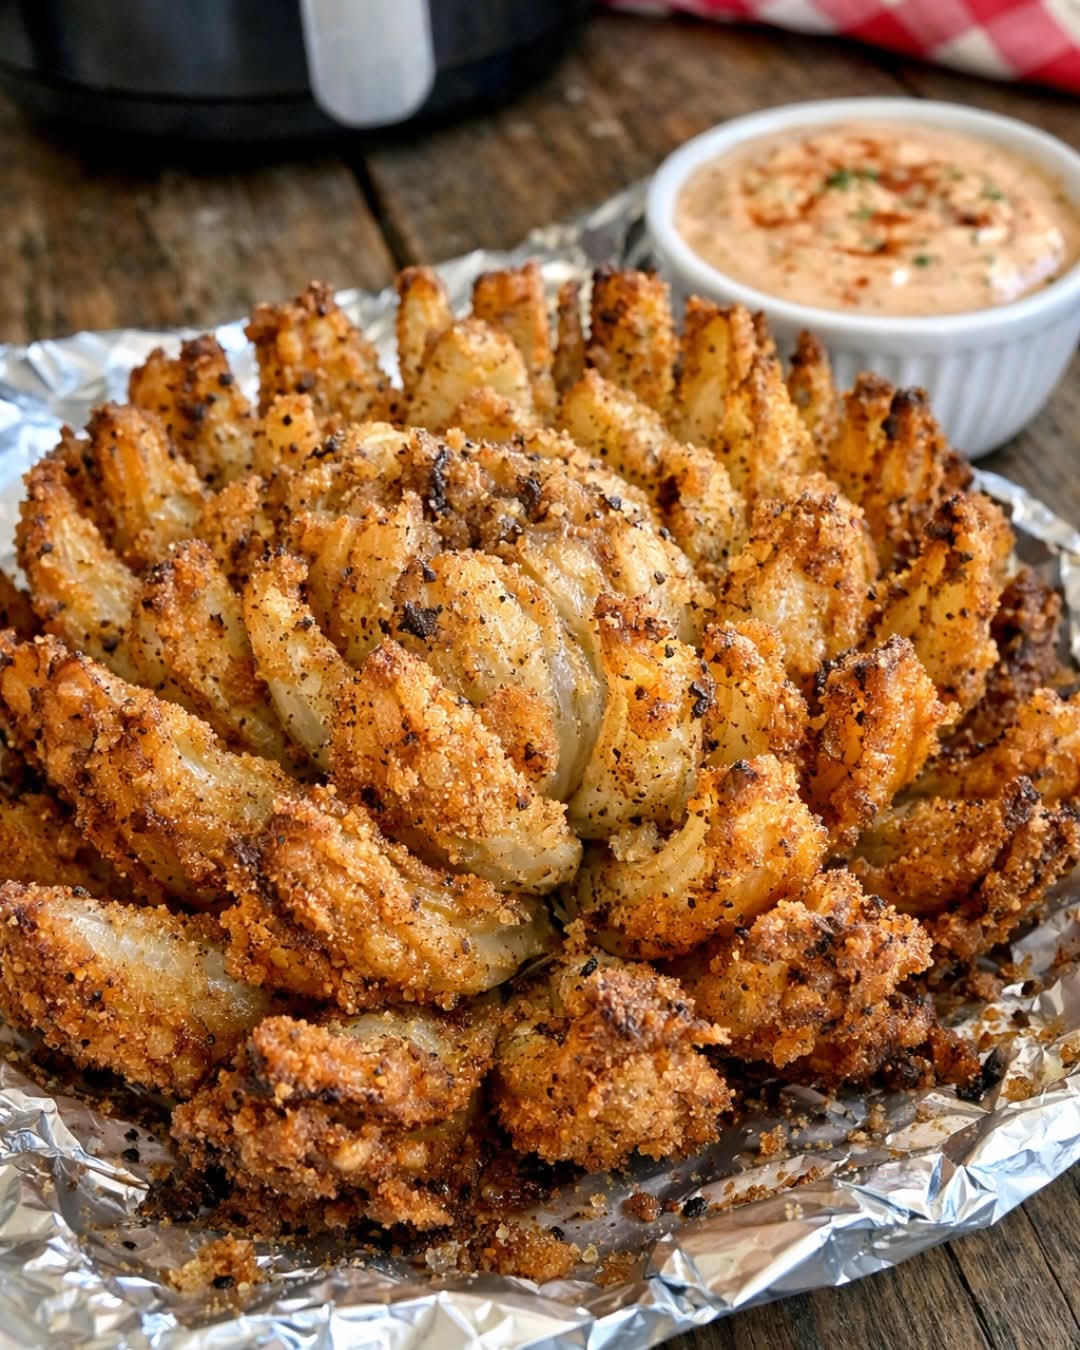
The Ultimate Air Fryer Blooming Onion Crispy Golden and Better Than the Steakhouse
There is something undeniably magnetic about a Blooming Onion. It is the king of appetizers, a centerpiece that commands attention the moment it hits the table with its golden petals unfurled and that signature spicy dipping sauce nestled in the center. Traditionally, this restaurant favorite is a calorie bomb, submerged in vats of bubbling oil until it’s as heavy as it is delicious. But what if you could achieve that same shatteringly crisp exterior and tender, sweet onion interior without the deep-fryer guilt? Enter the Air Fryer Blooming Onion. This recipe transforms the humble colossal onion into a culinary work of art using just a fraction of the oil. It’s crunchy, savory, and remarkably easy to make once you master the “petal” cut. In this guide, we’re going to walk through every step of creating the perfect air-fried bloom, from selecting the right onion to the science of the double-dredge, ensuring you get steakhouse-quality results in your own kitchen.
Why the Air Fryer is a Game-Changer for Blooming Onions
For years, home cooks avoided making blooming onions because deep-frying at home is, quite frankly, a hassle. It’s messy, it leaves your house smelling like a fast-food joint for days, and disposing of a gallon of used peanut oil is never fun. The air fryer solves all of these problems while offering a texture that rivals the original. By using rapid air technology, the air fryer circulates intense heat around every single petal, dehydrating the surface of the breading to create a crisp crust while steaming the onion inside until it’s buttery and mild. Because you aren’t submerging the onion, the breading stays light and airy rather than soaking up grease. This means the natural sweetness of the Vidalia or Walla Walla onion actually shines through, complemented by the spices rather than being buried under oil. It’s a cleaner, faster, and much more approachable way to enjoy one of the world’s most famous appetizers.
Selecting the Perfect Onion for Blooming
The foundation of a great blooming onion is, unsurprisingly, the onion itself. You cannot just grab any yellow onion from the bin and expect a masterpiece. To get those long, beautiful petals, you need a Colossal Sweet Onion. Look for varieties like Vidalia, Walla Walla, or Texas Sweets. These onions have a higher sugar and water content, which makes them less “stings-your-eyes” pungent and more “caramelized-and-sweet” when cooked. Size matters here; you want an onion that is roughly the size of a softball. A larger onion provides more surface area for the breading to cling to and ensures that the petals are thick enough to stand up during the air frying process without becoming brittle. When shopping, choose an onion that feels heavy for its size and has a tight, dry outer skin. Avoid any with soft spots or sprouts, as these will likely fall apart when you start making your precision cuts.
The Essential Tools for Success
While you don’t need a professional kitchen, a few specific tools will make this process significantly easier. First and foremost is a sharp Chef’s Knife. A dull blade will crush the onion layers rather than slicing through them, leading to broken petals. You’ll also find that having two sturdy wooden spoons or dowels is a lifesaver—placing them on either side of the onion while cutting prevents you from slicing all the way through the root, which is the “glue” that holds your bloom together. An air fryer with a large enough basket is also key. If your air fryer is a compact model, you might need to scale down the size of your onion to ensure there is at least an inch of clearance around the edges for proper airflow. Lastly, keep some aluminum foil or a small ramekin handy to help shape the onion if it’s particularly stubborn about opening up.
Mastering the Bloom: The Cutting Technique
Cutting a blooming onion is often the most intimidating part for beginners, but it’s actually quite methodical. Start by peeling the papery outer layers off the onion, but leave the root end completely intact. Cut off about a half-inch from the top (the pointy end) to create a flat surface. Place the onion flat-side down on your cutting board. This is where the wooden spoons come in: place one spoon on each side of the onion. Starting about a half-inch away from the center of the root, make a vertical slice straight down until your knife hits the spoons. Rotate the onion and repeat this, making four even quadrants. From there, divide each quadrant into three or four more slices, depending on the size of your onion. You should end up with 12 to 16 even sections. Once the cuts are made, flip the onion over and gently—very gently—use your fingers to fan out the petals. If the onion feels too tight, you can soak it in ice water for 30 minutes to help the petals naturally “bloom” and open up.
The Secret to the Perfect Breading: The Double Dredge
To get that thick, craggy crust that people love, a single dip in flour won’t cut it. We use a double-dredging technique that involves a seasoned flour mixture and a flavorful liquid wash.
The Dry Mix: Flavor in Every Bite
Your dry mixture should be more than just flour. For a 1500-word-worthy crust, mix all-purpose flour with cornstarch (which adds extra crunch), smoked paprika, garlic powder, onion powder, dried oregano, and a generous amount of cayenne pepper if you like heat. Don’t be shy with the salt and black pepper; the onion is a large, dense vegetable that needs significant seasoning to taste balanced. Sift these ingredients together in a large bowl so the spices are evenly distributed. When you apply the flour, the goal is to get it into every nook and cranny between the petals. Turn the onion upside down and shake it over the bowl to remove excess; you want a fine coating, not clumps.
The Wet Mix: The Glue
The liquid wash is what hydrates the flour and creates the batter. A combination of whole milk and eggs is standard, but adding a splash of hot sauce or Worcestershire sauce into the liquid adds a hidden layer of complexity. Submerge the floured onion into the liquid, ensuring it gets deep into the center. Then—and this is the crucial step—return the onion to the flour mixture for a second coating. This second layer is what creates those crispy “nuggets” of flavor on the tips of the petals. Make sure to use a spoon to pour flour into the center of the onion, then gently tap the root to shake off any loose bits that might burn in the air fryer.
Air Frying Instructions for Maximum Crunch
Once your onion is beautifully breaded, it’s time for the heat. Preheating your air fryer to 375°F (190°C) is essential; you want that initial blast of hot air to “set” the breading immediately.
The Importance of Oil Spray
Even though we aren’t deep-frying, the breading still needs a bit of fat to brown and crisp. Using an oil mister or a high-heat cooking spray (like avocado or grapeseed oil), generously coat the entire onion. Don’t forget to spray inside the petals. If you see white, dry flour spots, they will stay dry and chalky after cooking, so make sure every inch looks slightly moistened by the oil.
Timing and Temperature
Place the onion in the center of the air fryer basket. Cook for about 15 to 20 minutes. About halfway through, I recommend giving it another light spray of oil if any dry spots have appeared. You’ll know it’s done when the edges are a deep mahogany brown and the onion feels tender when pierced with a toothpick near the root. If the tips are browning too fast but the center is still raw, you can loosely tent the top with a small piece of foil to protect the petals while the core finishes cooking.
The Iconic Dipping Sauce: The Final Touch
A blooming onion without its dipping sauce is like a movie without a soundtrack—it just feels incomplete. The classic “Bloom Sauce” is a creamy, tangy, and slightly spicy remoulade-style dip. To make it, whisk together mayonnaise, sour cream, horseradish (the key ingredient for that “zing”), ketchup, paprika, and a pinch of cayenne. Let the sauce sit in the fridge for at least 30 minutes before serving. This allows the flavors to meld and the horseradish to permeate the cream base. The cool, sharp contrast of the sauce perfectly cuts through the savory, fried richness of the onion petals.
Troubleshooting Common Blooming Onion Mistakes
Even with a great recipe, things can go wrong. If your onion falls apart, it’s usually because you cut too close to the root or used an onion that wasn’t fresh. If the breading is falling off, it’s likely because the onion was too wet before the first dredge or you didn’t shake off the excess flour. To prevent a “soggy” bottom, some cooks prefer to place the onion on a small ring of crumpled foil to lift it slightly off the basket floor, allowing air to circulate underneath. If your air fryer has a “rotate” or “shake” reminder, ignore it for this recipe—moving the onion mid-cycle is a recipe for broken petals. Just let it sit and do its thing.
Nutrition and Variations: Making it Your Own
One of the best things about the Air Fryer Blooming Onion is that it’s naturally much lighter than the 1,500+ calorie versions found in restaurants. However, you can tweak this further. For a Gluten-Free Blooming Onion, simply swap the all-purpose flour for a high-quality 1-to-1 gluten-free flour blend and use crushed gluten-free crackers or cornmeal for added texture. For a Keto-friendly version, use almond flour mixed with parmesan cheese as the breading, though keep in mind it won’t be quite as “shaggy” as the traditional flour version. You can also experiment with the flavor profile by adding taco seasoning to the flour for a Mexican twist or using Old Bay seasoning for a coastal vibe.
Conclusion: The Perfect Party Appetizer
The Air Fryer Blooming Onion is more than just a snack; it’s a conversation piece. It proves that with a little bit of technique and the right appliance, you can recreate legendary restaurant dishes in a way that is healthier, cleaner, and arguably more delicious. Whether you’re hosting a game day party, a family dinner, or just craving a salty, crunchy treat, this recipe delivers on every front. The satisfaction of pulling back a perfectly crispy petal, dipping it deep into that spicy sauce, and hearing that audible crunch is worth every minute of prep time. So, grab a colossal onion, sharpen your knife, and get ready to impress everyone at the table with your air-frying prowess. Your kitchen is about to become the best steakhouse in town.