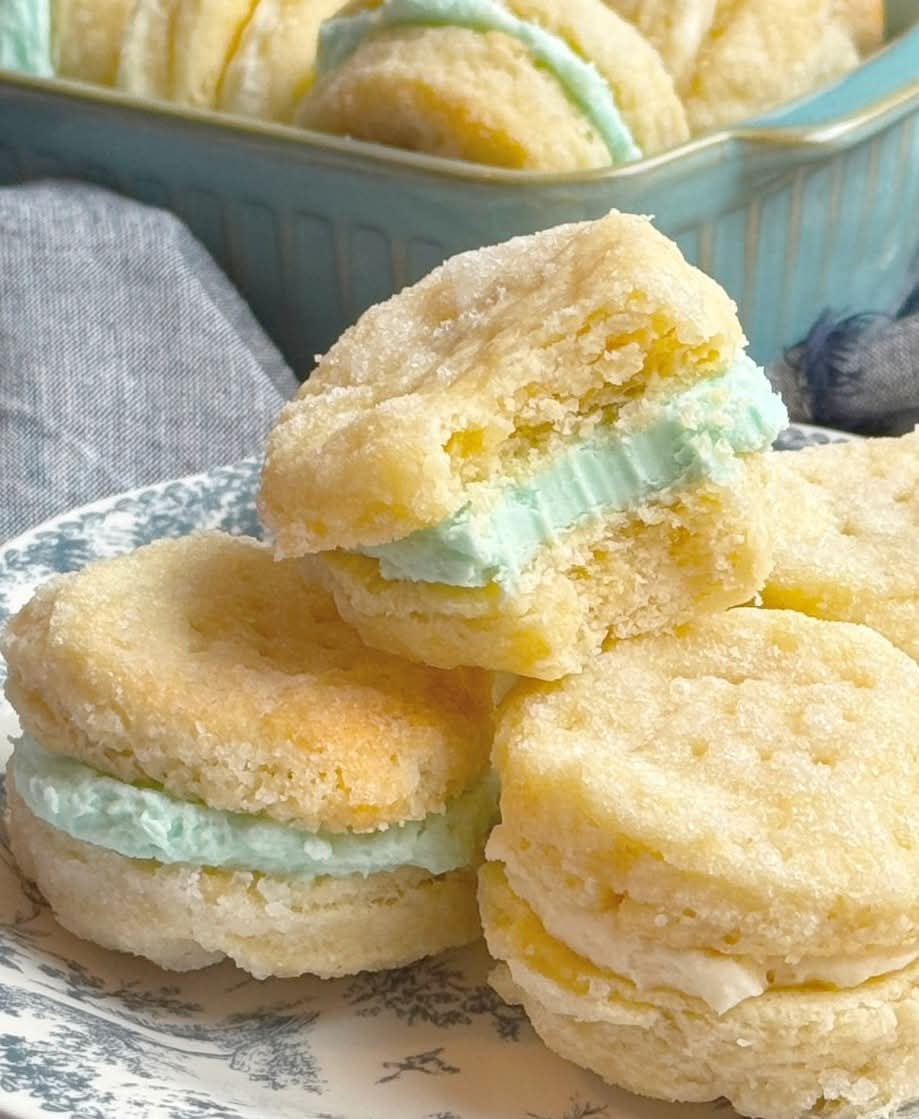
The Elegant Parisienne Cream Wafers A Delicate French Inspired Cookie
In the realm of delicate, elegant cookies, the Parisienne Cream Wafer holds a special place. These are not your ordinary cookies; they are sophisticated, melt-in-your-mouth sandwich cookies that embody the finesse of French patisserie. Imagine two impossibly tender, buttery wafer discs, so light they practically dissolve on the tongue, embracing a cloud of sweet, vanilla or chocolate cream filling. They are dainty, pretty, and surprisingly simple to make, requiring no special piping skills or exotic ingredients. Often associated with vintage tea parties and holiday cookie trays, Parisienne Wafers are a delightful project for bakers who appreciate precision and flavor over bold size and sweetness. This guide will walk you through the classic technique, from rolling and stamping the delicate dough to creating the perfect filling, resulting in a cookie that is as beautiful to look at as it is delicious to eat.
The Art of the Wafer: Understanding this Delicate Cookie
The Parisienne Cream Wafer is a study in textural contrast. The cookie itself is a type of sablée, or shortbread, with a high ratio of butter to flour. This creates a dough that is tender and crumbly, not crunchy. The unique step of coating the stamped-out dough rounds in granulated sugar before baking is crucial. As the cookies bake, the sugar partially melts and recrystallizes, creating a delicate, sparkling crust with a subtle crunch that gives way to the soft interior. The filling is typically a simple buttercream or a confectioners’ sugar-based “cream,” lightened to provide a smooth, sweet contrast without overwhelming the subtle butter flavor of the wafer. The final cookie is elegant in its simplicity, a true testament to the magic of butter, sugar, and flour when handled with care.
Gathering Your Ingredients for Elegant Simplicity
The ingredient list is blissfully short, emphasizing the importance of quality. Each component plays a distinct role in the final texture.
For the Wafer Dough:
· Butter: Use high-quality, unsalted butter at cool room temperature. It must be soft enough to cream but not greasy or melted. This is the primary source of flavor and tenderness.
· All-Purpose Flour: Provides structure. The dough is intentionally low in flour relative to butter, ensuring a tender bite.
· Heavy Cream: This is the liquid that binds the dough. Its fat content enriches the dough further, making it more tender than if milk or water were used.
· Granulated Sugar: For sweetening the dough and, importantly, for rolling. Coating the dough in sugar creates the signature delicate, crunchy exterior.
For the Cream Filling:
· Butter or Shortening: Butter provides superior flavor, while vegetable shortening yields a sturdier, whiter filling that holds its shape better at room temperature. A combination is often used.
· Powdered Sugar: The base of the filling, providing sweetness and structure.
· Flavorings: Pure vanilla extract is classic. For variety, a tablespoon of raspberry or strawberry jam, a teaspoon of citrus zest, or a bit of melted chocolate can be added.
Your Complete Ingredient List & Tools
Ingredients:
For the Wafer Cookies:
· 1 cup (2 sticks / 226g) unsalted butter, softened to cool room temperature
· 1/3 cup (80ml) heavy whipping cream
· 2 cups (250g) all-purpose flour, plus more for dusting
· Granulated sugar, for rolling (about 1 cup)
For the Vanilla Cream Filling:
· 1/4 cup (1/2 stick / 57g) unsalted butter, softened
· 1/4 cup (50g) vegetable shortening
· 2 cups (240g) powdered sugar, sifted
· 1 teaspoon pure vanilla extract
· 1-2 tablespoons milk or cream
Essential Equipment:
· Rolling pin
· Small round fluted or plain cookie cutter (1 to 1.5 inches in diameter)
· Fork or toothpick
· Baking sheets
· Parchment paper or silicone baking mats
· Electric mixer
Step-by-Step Instructions for Perfect Wafers
Step 1: Make and Chill the Dough
In a medium bowl, beat the softened butter and heavy cream together until smooth and combined. Gradually add the flour, mixing just until the dough comes together and no dry streaks remain. Do not overmix. Divide the dough in half, shape each into a flat disc, wrap tightly in plastic wrap, and refrigerate for at least 1 hour, or until firm. This chilling is essential for easy rolling.
Step 2: Roll, Cut, and Sugar-Coat
Preheat your oven to 375°F (190°C). Line baking sheets with parchment paper. Place a generous layer of granulated sugar (about 1/2 cup) on a small plate or shallow dish.
On a lightly floured surface, roll out one disc of dough to about 1/8-inch thickness. Using your small cookie cutter, cut out rounds. Use a fork or toothpick to prick each round 3-4 times; this prevents excessive puffing.
Carefully lift each round and press both sides into the granulated sugar, coating thoroughly. Place the sugar-coated rounds on the prepared baking sheet about 1 inch apart. Re-roll scraps and repeat with the second disc of dough.
Step 3: Bake to Perfection
Bake the cookies for 7-9 minutes. They are done when they are just set and the bottoms are very lightly browned. The tops will remain pale. Do not overbake, as they will continue to firm up as they cool. Let the cookies cool on the baking sheet for 2 minutes, then transfer them to a wire rack to cool completely.
Step 4: Prepare the Cream Filling
While the cookies cool, make the filling. In a medium bowl, beat the softened butter and shortening together until smooth and creamy. Gradually add the sifted powdered sugar, beating on low speed until combined. Add the vanilla extract and 1 tablespoon of milk. Beat on medium-high speed for 2-3 minutes until very light and fluffy. If the filling is too thick to spread easily, add more milk a teaspoon at a time.
Step 5: Assemble the Sandwich Cookies
Once the cookies are completely cool, match them into pairs of similar size. Spread or pipe a small amount of filling (about 1 teaspoon) onto the flat bottom side of one cookie. Gently press the bottom of its partner cookie onto the filling to create a sandwich