The Ultimate Crispy Chicken Strips A Foolproof Family Favorite Made Better at Home
There is a universal, almost primal, appeal to a perfectly cooked chicken strip. That satisfying contrast of a shatteringly crisp, golden exterior giving way to tender, juicy chicken inside is a dinner table peace treaty, beloved by kids and adults alike. But the frozen bag or fast-food version often comes with compromises: questionable meat quality, uneven seasoning, and a coating that can be either soggy or desiccated. This recipe is your declaration of independence from mediocrity. We’re creating The Ultimate Crispy Chicken Strips from scratch—a guaranteed crowd-pleaser that is surprisingly simple, uses wholesome ingredients, and delivers a crunch you can hear from across the room. This article will guide you through the secrets of achieving that ideal texture, from a flavorful brine for juiciness to a double-coating technique for maximum crispiness, ensuring your homemade version becomes an instant family legend.
The Science of the Perfect Strip: Why This Method Works
Achieving the holy grail of chicken strips—consistent juiciness inside with a durable, crispy shell—requires understanding a few key principles. First, we combat dryness by brining the chicken in a buttermilk and salt solution. The buttermilk’s acidity and enzymes tenderize the meat, while the salt ensures seasoned, moist chicken throughout. Second, we build a layered coating. A seasoned flour base creates a sticky glue. A dip in egg wash adds another binding layer. Finally, the star: a mixture of Panko breadcrumbs and finely crushed cornflakes. Panko provides a light, airy crunch, while cornflakes add an extra dimension of crispiness and a subtle sweetness that beats plain breadcrumbs every time. The final, non-negotiable step is frying at the correct temperature. Oil that’s too cool makes greasy strips; oil that’s too hot burns the coating before the chicken cooks through. This recipe balances all these elements for foolproof, restaurant-quality results.
Gathering Your Ingredients: Simple Components, Spectacular Results
For about 4-6 servings, you’ll need:
For the Buttermilk Brine:
· 1.5 lbs boneless, skinless chicken breasts (or tenders): Look for even thickness.
· 1.5 cups buttermilk: Full-fat preferred for the best tenderness.
· 1 tbsp hot sauce (like Frank’s RedHot): Adds a subtle background flavor, not heat.
· 1 tsp garlic powder
· 1 tsp onion powder
· 1 tsp salt
For the Three-Stage Breading Station:
- The Flour Dredge:
· 1 cup all-purpose flour
· 1 tsp paprika (smoked or sweet)
· 1 tsp garlic powder
· 1 tsp onion powder
· 1 tsp salt
· ½ tsp black pepper
· ½ tsp baking powder (a secret for extra crispiness!) - The Egg Wash:
· 2 large eggs
· 2 tbsp buttermilk or water - The Ultimate Crunch Coating:
· 1 cup Panko breadcrumbs
· 1 cup finely crushed cornflakes (place in a bag and crush with a rolling pin)
· ½ cup grated Parmesan cheese (optional but highly recommended)
· 1 tsp dried parsley
· ½ tsp salt
For Frying & Serving:
· Vegetable, canola, or peanut oil for frying (about 1-1.5 inches deep)
· Your favorite dipping sauces: Ranch, honey mustard, BBQ sauce, etc.
Essential Equipment for Stress-Free Frying
A large, heavy-bottomed pot or Dutch oven (for even heat), a deep-fry thermometer (CRUCIAL for oil temperature control), three shallow dishes (for the breading station), wire cooling racks set over a baking sheet (to keep cooked strips crisp), tongs, and paper towels.
Step-by-Step Instructions: Your Path to Crispy Glory
Step 1: The Brine for Juicy, Flavorful Chicken
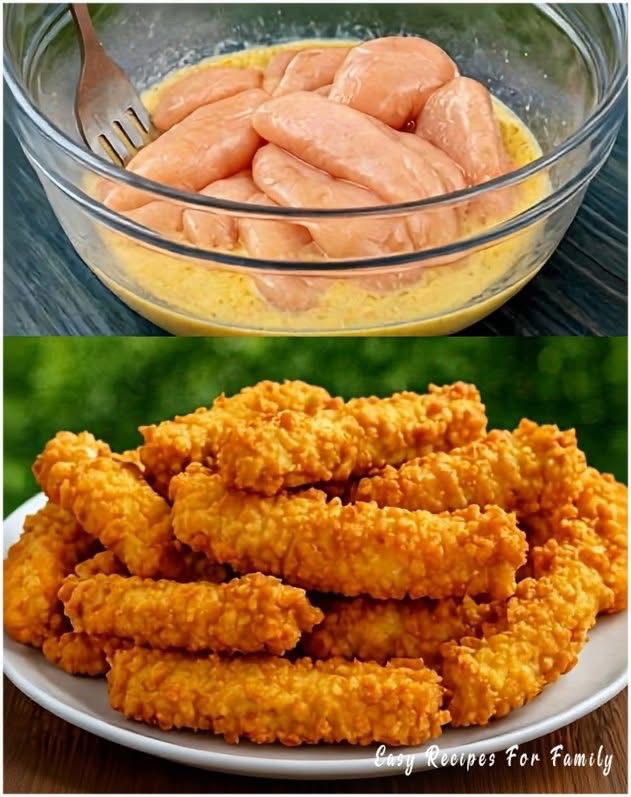
Cut the chicken breasts into 1-inch wide strips. If using tenders, you can leave them whole. In a large bowl or zip-top bag, whisk together the buttermilk, hot sauce, garlic powder, onion powder, and salt. Add the chicken strips, ensuring they’re fully submerged. Cover and refrigerate for at least 1 hour, or ideally up to 4 hours. This is the most important step for ensuring juicy results.
Step 2: Setting Up Your Breading Assembly Line
About 30 minutes before you’re ready to cook, remove the chicken from the fridge. Set up your three-stage breading station in shallow dishes: 1) Seasoned Flour, 2) Egg Wash (whisk eggs and buttermilk), 3) Panko-Cornflake Mix. Have a clean plate ready for the breaded strips. This organization is key to keeping your hands from becoming a clumpy mess.
Step 3: The Double-Coating Technique
Working with one piece at a time, remove chicken from the buttermilk brine, letting excess drip off. Dredge it thoroughly in the seasoned flour, shaking off any excess. Next, dip it into the egg wash, coating completely. Finally, press the chicken firmly into the Panko-cornflake mixture, ensuring an even, generous coating on all sides. Gently press the crumbs to adhere. Place the breaded strip on the clean plate. Repeat with all chicken pieces. Pro-Tip: For an extra-thick, extra-crispy crust, repeat the egg wash and crumb coating steps one more time.
Step 4: Frying at the Perfect Temperature
In your heavy pot, heat 1-1.5 inches of oil over medium-high heat to 350°F (175°C). Use your thermometer! This is not a step to eyeball. Once the oil is at temperature, carefully add a few chicken strips in a single layer, not overcrowding the pot. The oil temperature will drop; adjust the heat to maintain a steady 325°F (163°C) during frying. Fry for 3-5 minutes per side, turning once, until the coating is deep golden brown and the internal temperature of the chicken reaches 165°F (74°C).
Step 5: Draining for Lasting Crispness
Do not drain on paper towels, as the bottom steam will make it soggy. Instead, transfer the cooked chicken strips immediately to the wire rack set over a baking sheet. This allows air to circulate all around, keeping every inch crispy. You can keep them warm in a 250°F (120°C) oven while you finish frying the remaining batches.
Step 6: Serving Up Perfection
Serve the chicken strips hot with an array of dipping sauces. They are best enjoyed immediately but re-crisp remarkably well in an air fryer or toaster oven.
Pro Tips, Tricks, and Healthier Variations
· The Thermometer is Law: Consistent oil temp is 90% of success.
· Dry Hands, Wet Hands: Use one hand for the dry steps (flour, crumbs) and the other for the wet step (egg wash) to avoid finger-clumping.
· Baking Option: For a lighter version, preheat oven to 425°F (220°C). Place breaded strips on a wire rack set on a baking sheet. Spray generously with cooking spray or drizzle with oil. Bake for 15-20 mins, flipping halfway, until crispy and cooked through.
· Air Fryer Method: Spray breaded strips with oil and air fry at 400°F (200°C) for 10-12 minutes, flipping halfway.
· Gluten-Free: Use a 1:1 GF flour blend and certified GF cornflakes and Panko.
· Flavor Variations: Add cayenne to the flour for spicy strips, or Italian seasoning to the crumbs for an herb-forward version.
Serving Suggestions: Building the Ultimate Comfort Meal
These strips are the star. Serve them as the main event with classic French fries or sweet potato fries, creamy coleslaw, and buttery corn on the cob. For a fun “build-your-own” dinner, set out the strips with soft slider buns, lettuce, tomato, pickles, and special sauce to make incredible chicken sliders. They also make a fantastic protein for a salad or a wrap.
Conclusion: Reclaiming a Classic with Confidence
Homemade Crispy Chicken Strips are a testament to the power of a well-executed simple recipe. They offer the deep satisfaction of creating a universally loved food from scratch, with quality and care you can see, hear, and taste. By mastering the brine, the breading, and the fry, you equip yourself with a culinary powerhouse—a dish that guarantees smiles, solves weeknight dinner dilemmas, and is far superior to anything from a freezer aisle. So, heat that oil, set up your station, and get ready for the sound of pure, crispy joy. Your family’s new favorite dinner is just a few dunks and a sizzle away.