The Ultimate American Irish Soda Bread A Simple No Yeast Staple for Any Table
There is a profound satisfaction in baking bread that requires no yeast, no proofing, and no intricate technique, yet emerges from the oven golden, fragrant, and deeply comforting. American Irish Soda Bread is exactly that—a humble, quick, and utterly delicious bread born from necessity and sustained by its sheer, undeniable goodness. Unlike its denser, more austere Irish cousin, the American version is a slightly sweeter, richer loaf, often studded with plump raisins or currants and fragrant with caraway seeds. It’s a bread that comes together in minutes, bakes in under an hour, and fills the kitchen with an aroma that promises warmth and nourishment. This guide will walk you through creating the perfect loaf, with a crisp, craggy crust and a tender, slightly crumbly interior that’s ideal for slathering with butter, pairing with a hearty stew, or enjoying as a simple snack. Let’s demystify this classic and celebrate the art of simple baking.
Understanding American Irish Soda Bread: A Story of Adaptation
It’s important to distinguish this bread from traditional Irish soda bread. The original, from Ireland, was a bare-bones recipe of just flour, baking soda, salt, and buttermilk—a “griddle bread” meant to be eaten the day it was made. When Irish immigrants arrived in America, they found a land of greater abundance. Ingredients like sugar, eggs, butter, and dried fruit, which were luxuries back home, became incorporated into the recipe. Thus, the American Irish Soda Bread was born: a slightly sweeter, richer, and more cake-like loaf, often baked in a round and marked with a deep cross on top (said to “let the devil out” and ensure even baking). This is the beloved version found in countless American bakeries and homes, especially around St. Patrick’s Day. It answers a universal user intent: the desire for a fast, foolproof, from-scratch bread that feels special and tastes like home.
Gathering Your Ingredients: The Simple Pantry List
The beauty of this bread is in its accessibility. Every ingredient is a kitchen staple, and their combination is where the magic happens.
For the Bread:
· 4 cups (500g) all-purpose flour, plus extra for dusting
· ¼ cup (50g) granulated sugar
· 1 teaspoon baking soda
· 1 tablespoon baking powder
· 1 ½ teaspoons salt
· 4 tablespoons (½ stick / 57g) cold unsalted butter, cut into small cubes
· 1 ¾ cups (420ml) buttermilk, cold (see tip below for substitution)
· 1 large egg, lightly beaten
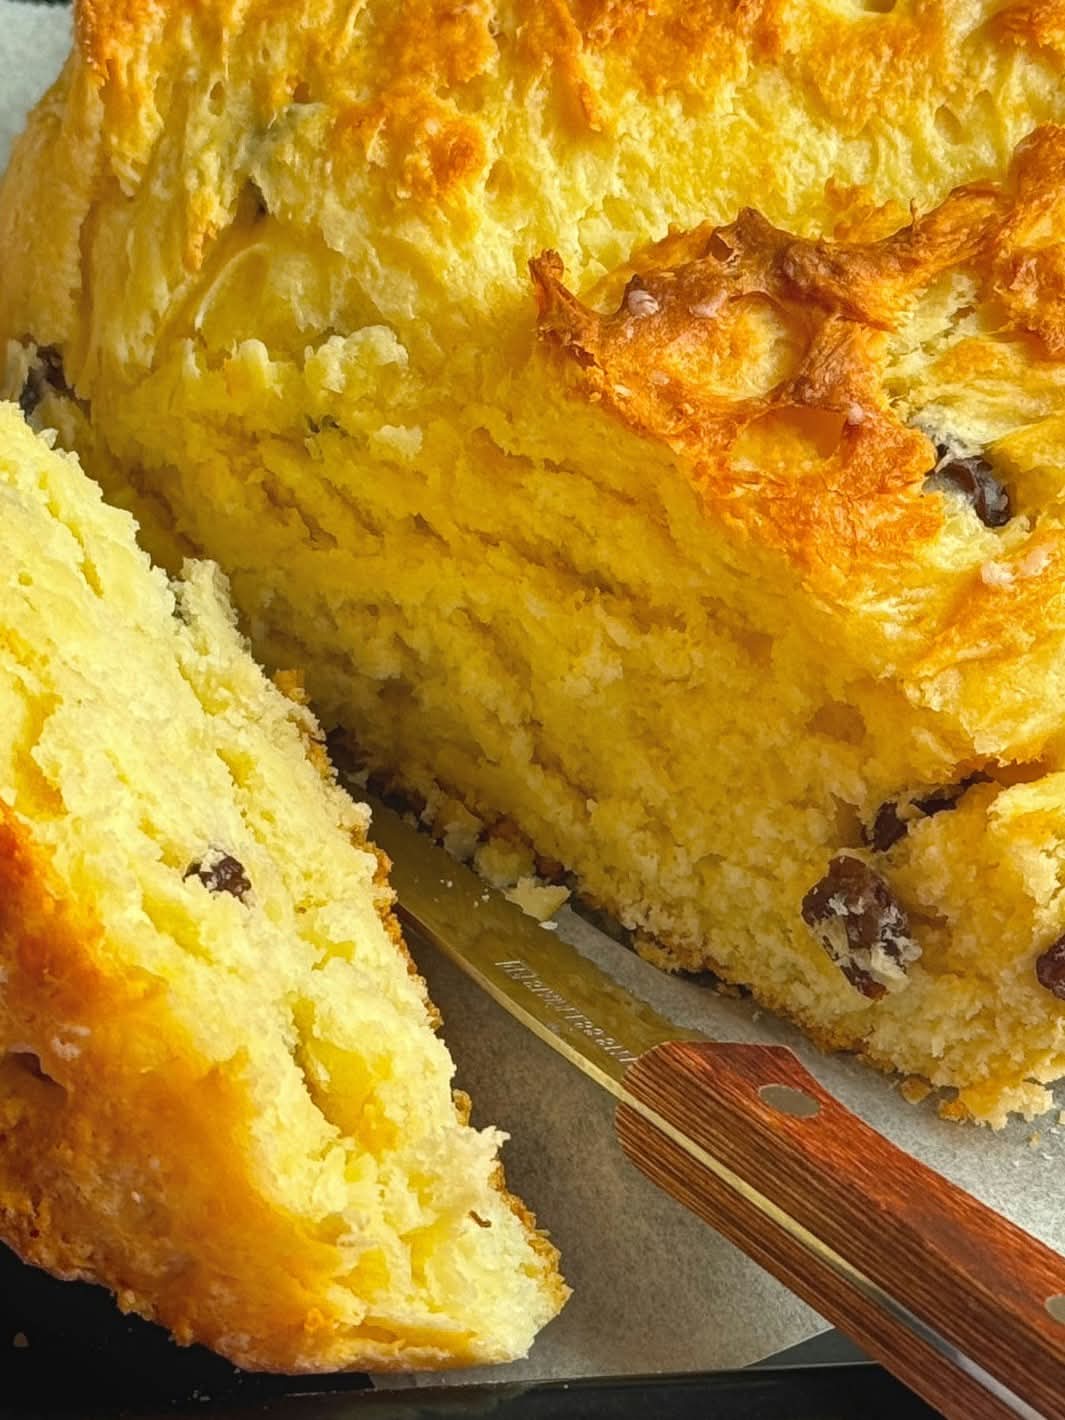
· 1 ½ cups (200g) raisins or dried currants
· 1 tablespoon caraway seeds (optional, but traditional)
For the Glaze & Topping (Optional but Recommended):
· 1 tablespoon buttermilk
· 1 tablespoon melted butter
· A sprinkle of rolled oats or flour for dusting
Essential Equipment: No Special Tools Required
· Large Mixing Bowl: For combining the dry and wet ingredients.
· Whisk and Wooden Spoon or Spatula
· Rimmed Baking Sheet or 9-inch Cast Iron Skillet/Cake Pan: A baking sheet yields a free-form, rustic loaf; a skillet or pan gives a more defined, round shape.
· Sharp Knife or Bench Scraper: For cutting the deep cross in the dough.
Step-by-Step Instructions: The Foolproof Method
The key to success is a light hand and speed—overmixing is the enemy of a tender soda bread.
Step 1: Preparing and Mixing the Dry Ingredients
Preheat your oven to 375°F (190°C). Line a rimmed baking sheet with parchment paper, or lightly grease a 9-inch cast iron skillet or cake pan. In your large mixing bowl, whisk together the flour, sugar, baking soda, baking powder, and salt. Add the cold, cubed butter. Using a pastry cutter, your fingertips, or two forks, work the butter into the flour mixture until it resembles coarse crumbs with some pea-sized pieces of butter remaining. This step creates pockets of steam and fat for a tender crumb. Stir in the raisins and caraway seeds (if using), ensuring they are coated in flour to prevent sinking.
Step 2: Combining Wet and Dry – The “No-Knead” Way
Make a well in the center of the dry ingredients. In a separate bowl or measuring jug, whisk together the cold buttermilk and the beaten egg. Pour the buttermilk mixture all at once into the well. Using a wooden spoon or your hand, stir gently and quickly, just until the dry ingredients are moistened and a shaggy, sticky dough begins to form. It will look rough and uneven—this is perfect. The dough should be quite wet. Do not overmix; this is the most critical instruction.
Step 3: Shaping and Scoring the Dough
Turn the sticky dough out onto a lightly floured surface. With floured hands, gently pat and shape it into a round loaf about 7-8 inches in diameter. Do not knead it; simply fold it over on itself a few times to create a round shape. Transfer the loaf to your prepared baking sheet or skillet. Using a sharp, floured knife or a bench scraper, cut a deep cross (about ¾-inch deep) into the top of the loaf. This iconic cross helps the heat penetrate the thickest part of the dough, ensuring it bakes through and gives the bread its classic appearance.
Step 4: Baking to Perfection
If using the optional glaze, brush the top of the loaf with the tablespoon of buttermilk and sprinkle lightly with oats or a dusting of flour. Bake in the preheated oven for 45 to 55 minutes. The bread is done when it is a deep golden brown, sounds hollow when tapped on the bottom, and a long skewer inserted into the center (where the cross lines meet) comes out clean.
Step 5: The Essential Cooling
Remove the bread from the oven. For a soft crust, immediately brush the top with the melted butter. Transfer the loaf to a wire cooling rack. This is vital: you must let the bread cool for at least 30-45 minutes before slicing. Cutting into a hot soda bread will result in a gummy, doughy interior as the steam is still escaping and the structure is still setting. Patience rewards you with the perfect crumb.
Pro Tips for the Best Soda Bread
· Keep Everything Cold: Cold butter and cold buttermilk are essential. They interact with the baking soda and powder to create maximum lift and a better texture.
· Don’t Have Buttermilk? Make your own: Add 1 tablespoon of white vinegar or lemon juice to 1 ¾ cups of milk. Let it stand for 5-10 minutes until it curdles slightly.
· The Shaggy Dough: A wet, shaggy dough is a good dough. If you add too much flour or work it until it’s smooth, the bread will be tough and dense.
· Test for Doneness: The hollow sound is the best indicator. The internal temperature should read about 190°F (88°C) if using a thermometer.
· Storage: Soda bread is best eaten the day it’s made. Store any leftovers wrapped in foil at room temperature for up to 2 days. It toasts beautifully.
Flavor Variations and Add-Ins
The basic recipe is a wonderful canvas:
· Orange Zest & Cranberry: Add the zest of one orange and substitute the raisins with dried cranberries for a festive twist.
· Cheddar & Herb Savory Loaf: Omit the sugar, raisins, and caraway. Fold in 1 ½ cups of shredded sharp cheddar cheese and 2 tablespoons of chopped fresh herbs like rosemary or chives.
· Whole Wheat: Substitute half of the all-purpose flour with whole wheat flour for a heartier, nuttier loaf.
· Seeded Soda Bread: Add a mix of sunflower seeds, pumpkin seeds, and flax seeds to the dough for extra texture and nutrition.
Conclusion: The Joy of Instant Gratification Baking
American Irish Soda Bread is a celebration of simplicity and immediate reward. In less than an hour of active time, you can transform basic pantry staples into a magnificent, aromatic loaf that feels both rustic and special. It teaches fundamental baking principles—the importance of barely mixing, the science of acid-base reactions (buttermilk and baking soda), and the virtue of patience in cooling. This bread doesn’t just feed the stomach; it feeds the soul with its humble charm and delicious, comforting flavor. Whether you’re celebrating a heritage, needing a quick bread for supper, or simply craving the tactile joy of baking, this soda bread recipe is your perfect, reliable companion. Slice it thick, spread it with good butter, and enjoy a timeless taste of home-baked comfort.