Creamy Custard Squares with Golden Top The Ultimate Guide to This Irresistible Dessert
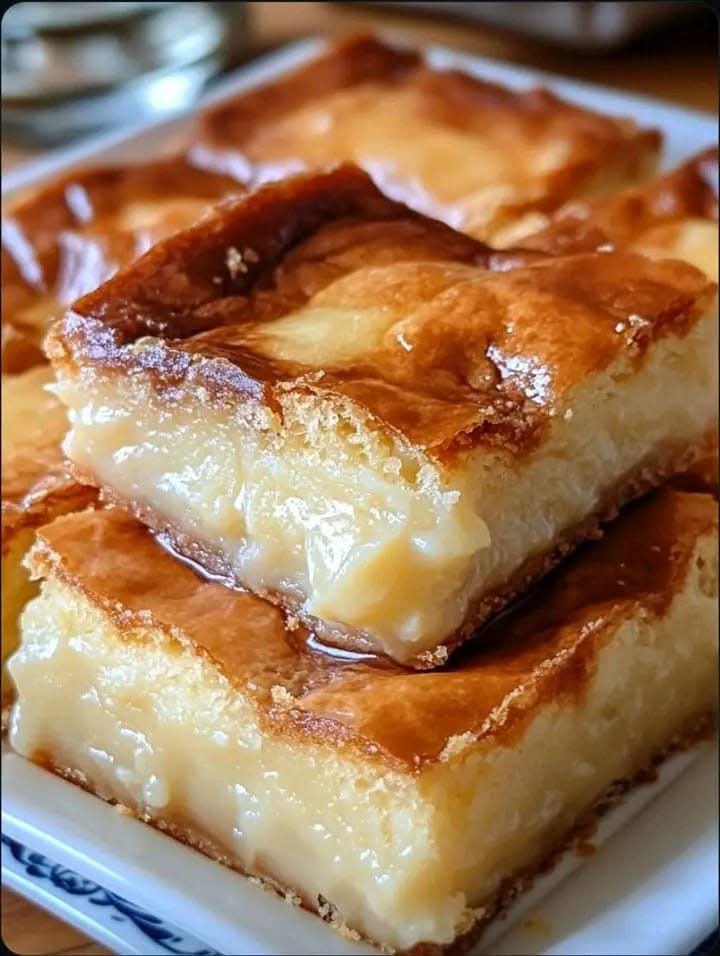
There is a special magic to desserts that combine seemingly simple ingredients into something far greater than the sum of their parts. At the top of that list sits the iconic Creamy Custard Square—a dessert known by many names: mille-feuille, vanilla slice, and even the playful “snot block” in some regions. But by any name, its allure is universal: a crisp, flaky, buttery puff pastry base and top, sandwiching a thick, luscious, and impossibly smooth vanilla custard that holds its shape with pride, all finished with a simple yet dazzling glaze or a dusting of powdered sugar. That golden, crisp top gives way to a creamy, cool center in a textural symphony that is both comforting and elegant. Achieving the perfect custard square, however, is a culinary art. The custard must be firm yet silky, the pastry perfectly baked, and the assembly just right. This comprehensive guide will walk you through every step, from selecting the right ingredients to mastering the techniques that ensure flawless, bakery-worthy custard squares every single time.
The Anatomy of a Perfect Custard Square: Why It Captivates
What makes a custard square so irresistible? It’s the masterful contrast. The shattering, golden layers of puff pastry provide a satisfying crunch that immediately gives way to the rich, cool, and velvety custard filling. Unlike a runny custard or a pastry cream, the filling in a traditional square is sturdy enough to be hand-held, yet melts delicately on the tongue. This dessert is a study in balance: the sweetness of the icing against the slight savoriness of the butter pastry, the richness of the custard cut by the crispness of the bake. It’s a nostalgic treat for many, reminiscent of bakery counters and community gatherings, yet it holds its own at any sophisticated dinner party. Understanding its components is the first step to mastering it at home, transforming basic pantry staples into a show-stopping centerpiece.
Decoding the Ingredients: Your Shopping List for Success
The ingredient list for custard squares is beautifully straightforward, but each component plays a critical role. Using high-quality elements here is non-negotiable for the best flavor and texture.
For the Pastry & Structure:
· 2 sheets of ready-rolled all-butter puff pastry (approx. 25cm x 25cm / 10in x 10in each), thawed according to package instructions. Note: All-butter puff pastry provides superior flavor and flakiness.
· 1 tablespoon of granulated sugar (for sprinkling on the pastry)
For the Legendary Custard Filling:
· 750ml (3 cups) of full-cream (whole) milk
· 300ml (1 ¼ cups) of pure cream (heavy whipping cream)
· 1 teaspoon of pure vanilla bean paste or extract (paste provides those beautiful speckles)
· 6 large egg yolks, at room temperature
· 150g (¾ cup) of granulated white sugar
· 80g (⅔ cup) of cornflour (cornstarch) – this is the essential thickener
· 60g (¼ cup) of unsalted butter, cubed and softened
For the Golden Icing Top:
· 200g (approx. 1 ½ cups) of pure icing sugar (powdered sugar), sifted
· 2-3 tablespoons of warm water, milk, or lemon juice
· Optional: 1-2 drops of yellow food colouring for that classic “bakery” look
Essential Equipment for Precision
Having the right tools makes the process seamless and professional:
· Two Baking Sheets & Parchment Paper: For baking the pastry flat.
· Large Saucepan: A heavy-bottomed pan is best for even heat distribution when cooking the custard.
· Whisk and Rubber Spatula: A whisk for smooth mixing and a spatula for scraping.
· Fine Mesh Sieve: For straining the custard to ensure ultimate silkiness.
· 8-inch or 9-inch Square Baking Pan: This will be your assembly frame and mold. Lining it with parchment paper with overhanging edges is crucial for easy removal.
· Instant-Read Thermometer (Optional but Helpful): To precisely gauge the custard’s cooking temperature.
Masterful Method: Crafting Your Custard Squares Step-by-Step
This process is broken down into three key stages: baking the perfect pastry, crafting the flawless custard, and the final assembly and glaze. Patience and attention to detail in each stage are your keys to success.
Stage 1: Preparing the Puff Pastry Foundation
The goal is flat, crisp, evenly golden pastry sheets. Preheat your oven to 200°C (400°F). Line two baking sheets with parchment paper. Unroll one sheet of thawed puff pastry onto each prepared sheet. Prick the pastry all over with a fork—this technique, called “docking,” prevents it from puffing up too dramatically. For extra weight, you can place another sheet of parchment on top and then nest an identical baking sheet on top to act as a press. Bake for 15-20 minutes, or until the pastry is fully puffed, deep golden brown, and crisp. If you didn’t use a top baking sheet, you may need to gently press the pastry down with a spatula as soon as it comes out of the oven. Sprinkle one sheet lightly with the tablespoon of granulated sugar while still hot—this will be your top layer. Let both sheets cool completely on a wire rack.
Stage 2: The Heart of the Matter – Cooking the Custard
This is the most crucial step. A lumpy or undercooked custard will ruin the dessert. In your large saucepan, combine the milk, cream, and vanilla. Heat over medium until it just comes to a simmer, then remove from heat. In a separate large bowl, vigorously whisk the egg yolks and sugar together until pale and slightly thickened. Add the cornflour (cornstarch) and whisk until you have a completely smooth, thick paste. While whisking constantly, slowly drizzle about one cup of the hot milk mixture into the egg yolk mixture to temper it. This gradual introduction prevents the eggs from scrambling. Now, pour the tempered yolk mixture back into the saucepan with the remaining milk.
Return the saucepan to medium heat. Cook, whisking constantly and thoroughly, especially at the bottom and corners of the pan. The mixture will begin to thicken. Continue cooking and whisking for a full 2-3 minutes after the first boil appears—large bubbles should plop on the surface. The custard must reach about 95°C (203°F) to fully activate the cornflour; it will become very thick and smooth. Remove from heat immediately and whisk in the softened butter until fully incorporated and glossy.
Critical Step: Immediately pour the hot custard through a fine-mesh sieve into a clean bowl. This catches any potential cooked egg bits and ensures a perfectly silken texture. Press a piece of plastic wrap directly onto the surface of the custard to prevent a skin from forming. Let it cool for 15 minutes at room temperature before assembling.
Stage 3: Assembly, Setting, and the Golden Finish
Now, you build your masterpiece. Take your square baking pan and line it with parchment paper, leaving overhang on all sides. Place one completely cooled sheet of puff pastry (the one without sugar, if you used it) into the bottom of the pan. You may need to trim it slightly to fit. Pour the warm, thickened custard over the pastry base. Use an offset spatula or the back of a spoon to spread it into a perfectly smooth, even layer. Gently place the second sheet of pastry (the sugared one, if using) on top, pressing down lightly. Cover with plastic wrap and refrigerate for a minimum of 6 hours, but ideally overnight. This extended chill is non-negotiable; it allows the custard to set firmly and the flavors to meld.
The Icing: Just before serving, prepare the icing. In a medium bowl, combine the sifted icing sugar with 2 tablespoons of your chosen liquid (water, milk, or lemon juice). Whisk until completely smooth, adding more liquid a teaspoon at a time until you reach a thick but pourable consistency. Add a drop or two of yellow food colouring if desired. Pour the icing over the top pastry sheet, spreading it gently to the edges with a spatula. Allow it to set for 10-15 minutes.
The Grand Finale: Using the parchment paper overhang, carefully lift the entire set square out of the pan and onto a cutting board. Using a large, sharp knife dipped in hot water and wiped dry between each cut, trim the edges neatly (a chef’s treat!) and slice into squares. Clean cuts are essential for that pristine bakery appearance.
Pro-Tips for Flawless Custard Squares Every Time
· Temper, Temper, Temper: Do not rush adding the hot liquid to the eggs. This is the single most important technique for a smooth custard.
· Cook with Confidence: Don’t be afraid to cook the custard for the full 2-3 minutes after boiling. Undercooked cornflour will lead to a filling that never properly sets.
· The Chill is Key: Rushing the refrigeration stage will result in a messy, loose slice. Patience rewards you with clean layers.
· Sharp Knife, Hot Water: This is the secret weapon for getting perfectly clean slices without dragging the icing or cracking the pastry.
· Flavor Twists: Infuse the milk with a cinnamon stick or citrus zest for a subtle variation. You can also layer sliced strawberries or a thin spread of raspberry jam on the bottom pastry before adding the custard.
Conclusion: A Timeless Dessert, Perfected in Your Kitchen
The journey to creating the perfect Creamy Custard Square with its signature Golden Top is a rewarding lesson in classic dessert technique. It teaches the fundamentals of custard-making, the importance of texture contrast, and the virtue of patience. While the process requires careful attention, it does not require advanced skills—just a willingness to follow the steps with care. The result is nothing short of spectacular: a dessert that is both humble and grand, familiar and impressive. Whether you’re making it for a special occasion, a weekend treat, or simply to master a iconic bake, this custard square recipe promises to deliver that unforgettable combination of crisp, creamy, and sweet in every single bite. So, roll up your sleeves, whisk with purpose, and prepare to create a dessert that will have everyone asking for your secret and reaching for just one more square.