Homemade bread is one of the most comforting and rewarding foods you can make in your own kitchen. Few things compare to the aroma of freshly baked bread filling your home, the sound of a crust crackling as it cools, and the first warm slice slathered with butter. This homemade bread recipe is designed for home bakers of all levels, whether you are making bread for the first time or refining your technique. With simple ingredients, clear steps, and expert tips, this guide will help you bake a beautiful loaf with a crisp golden crust and a soft, airy interior every single time.
Why Homemade Bread Is Worth Making
Making bread at home is more than just a cooking project; it is a skill that brings both satisfaction and quality to your meals. Store-bought bread often contains preservatives, additives, and unnecessary sugars. Homemade bread allows you to control every ingredient, resulting in a fresher, healthier loaf with superior flavor and texture. Baking bread also connects you to a centuries-old tradition, turning basic pantry staples into something nourishing and deeply comforting.
What Makes This Homemade Bread Recipe Special
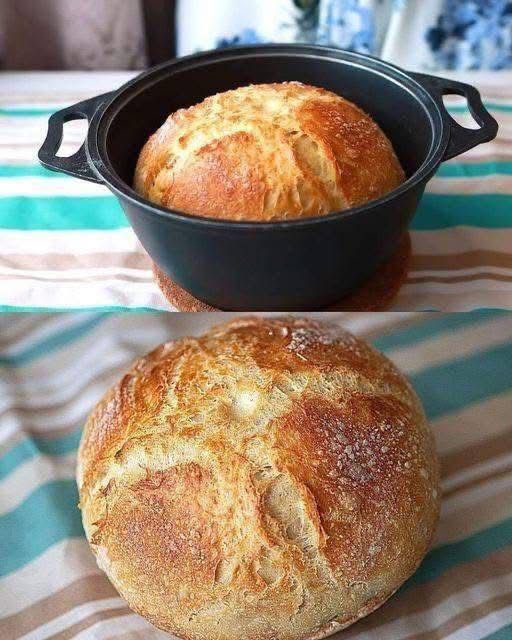
This homemade bread recipe focuses on simplicity without sacrificing results. It uses basic ingredients that most people already have in their kitchen and relies on time-tested techniques rather than complicated equipment. The method produces a rustic, artisan-style loaf with a chewy crumb and a crisp crust, similar to bakery bread baked in a Dutch oven. It is versatile enough to be adapted with herbs, seeds, or whole grains while remaining reliable and beginner-friendly.
Ingredients for Homemade Bread
Basic Bread Ingredients Explained
Flour is the foundation of homemade bread. All-purpose flour works well for this recipe, but bread flour can be used for a slightly chewier texture due to its higher protein content. Water hydrates the flour and activates the yeast. Yeast is responsible for fermentation and rise, creating the airy structure of the bread. Salt enhances flavor and strengthens the dough structure. A small amount of oil or fat is optional but can improve softness and shelf life.
Ingredient List
You will need flour, warm water, active dry yeast or instant yeast, salt, and optional olive oil. These simple ingredients combine to create a loaf that is far greater than the sum of its parts.
Essential Tools for Baking Bread at Home
You do not need specialized equipment to make homemade bread, but a few basic tools help ensure success. A large mixing bowl is necessary for combining ingredients and allowing the dough to rise. A wooden spoon or your hands are enough for mixing. A clean kitchen towel or plastic wrap is used to cover the dough during proofing. A Dutch oven or heavy oven-safe pot with a lid is ideal for achieving a professional-quality crust, as it traps steam during baking.
Step-by-Step Homemade Bread Instructions
Mixing the Dough
Begin by dissolving the yeast in warm water. The water should be warm to the touch but not hot, as excessive heat can kill the yeast. Allow the yeast to sit for several minutes until it becomes foamy, indicating that it is active. Add flour and salt to the yeast mixture and stir until a shaggy dough forms. If using oil, add it at this stage. The dough will look rough and sticky, which is exactly what you want.
First Rise and Fermentation
Cover the bowl with a clean towel or plastic wrap and allow the dough to rise at room temperature. This first rise is crucial for developing flavor and structure. During this time, yeast ferments the sugars in the flour, producing gas that causes the dough to expand. Depending on room temperature, the dough should double in size within one to two hours.
Shaping the Dough
Once the dough has risen, gently turn it out onto a lightly floured surface. Do not knead aggressively; instead, fold the dough over itself a few times to create surface tension. Shape it into a round loaf by tucking the edges underneath. This shaping step helps the bread rise upward rather than spreading outward.
Second Rise
Place the shaped dough onto parchment paper or a floured surface and cover it again. Allow it to rest and rise for about thirty to forty-five minutes. This second rise improves the final texture and ensures a lighter crumb.
Baking the Bread
Preheat your oven with the Dutch oven inside. A hot baking vessel is essential for oven spring, the rapid rise that occurs when the dough first enters the oven. Carefully transfer the dough into the hot pot using the parchment paper as a sling. Cover with the lid and bake to trap steam, which creates a crisp crust. After removing the lid, continue baking until the bread is deeply golden brown.
Cooling the Bread
Once baked, remove the bread from the pot and allow it to cool on a wire rack. Cooling is important because the interior continues to set as steam escapes. Cutting too early can result in a gummy texture, so patience is key.
Tips for Perfect Homemade Bread
Temperature control plays a major role in bread baking. Warm environments encourage faster fermentation, while cooler conditions slow it down and deepen flavor. Measuring ingredients accurately ensures consistent results, especially flour and water ratios. Avoid adding too much flour during shaping, as this can lead to a dense loaf. Steam during baking is critical for crust development, which is why covered baking methods work so well.
Common Homemade Bread Mistakes and How to Avoid Them
One common mistake is using water that is too hot, which kills yeast and prevents proper rising. Another is under-proofing or over-proofing the dough. Under-proofed dough results in dense bread, while over-proofed dough can collapse. Cutting into the bread too soon is also a frequent error that affects texture. Allowing proper cooling time solves this issue.
Variations of Homemade Bread
Whole Wheat Bread
Substitute part of the all-purpose flour with whole wheat flour for a heartier loaf. Whole wheat flour absorbs more water, so slight adjustments to hydration may be necessary.
Herb and Garlic Bread
Add dried herbs such as rosemary or thyme and minced garlic to the dough for a flavorful variation that pairs well with soups and pasta.
Seeded Bread
Incorporate seeds like sesame, sunflower, or flax into the dough or sprinkle them on top for added crunch and nutrition.
No-Knead Overnight Bread
Allowing the dough to ferment overnight in the refrigerator develops complex flavor and improves texture. This method requires minimal effort and produces excellent results.
How to Store Homemade Bread
Homemade bread is best enjoyed fresh but can be stored properly to maintain quality. Keep it at room temperature in a paper bag or wrapped in a clean cloth for up to two days. Avoid plastic bags, which trap moisture and soften the crust. For longer storage, slice the bread and freeze it in an airtight container. Frozen bread can be toasted directly without thawing.
Health Benefits of Homemade Bread
Homemade bread can be healthier than store-bought options because it contains fewer additives and preservatives. You control the amount of salt and sugar, and you can choose higher-quality flours or incorporate whole grains. Freshly baked bread also tends to be more satisfying, which may help with portion control.
Serving Ideas for Homemade Bread
Homemade bread is incredibly versatile. Serve it warm with butter or olive oil, use it for sandwiches, toast it for breakfast, or pair it with soups and stews. It also makes excellent bruschetta, garlic bread, or croutons when slightly stale.
Frequently Asked Questions About Homemade Bread
Many people wonder if bread making is difficult. While it requires patience, it is not complicated, and practice quickly builds confidence. Another common question is whether kneading is necessary. This recipe minimizes kneading while still developing structure through fermentation and folding. If your bread does not rise, check yeast freshness and water temperature.
Conclusion: Bake Better Bread at Home
Homemade bread is one of the most satisfying foods you can make, combining simplicity, tradition, and unbeatable flavor. This homemade bread recipe proves that you do not need advanced skills or expensive equipment to bake a beautiful loaf at home. With a few basic ingredients, a little patience, and the right technique, you can enjoy fresh, crusty bread whenever you want. Once you experience the taste and aroma of homemade bread, it will quickly become a staple in your kitchen and a skill you return to again and again.